FAQS
TIPS
How are floor and ceiling registers used?

How are floor and ceiling registers used?
Floor registers are part of your heating and ventilation system. They give you an important way to regulate airflow within your home.
Here are some of the ways Imperial Floor Registers can add comfort to your home:
- Maintain uniform temperatures from room to room
- Direct air flow away from certain areas
- Isolate rooms that you don’t need to heat or cool
- Block cold air from entering the home from the basement
- Help circulate cold air from the basement to cool the home
- Move warm air produced by a wood stove to the upper floors
What is the difference between a register and a grille?
What is a register?
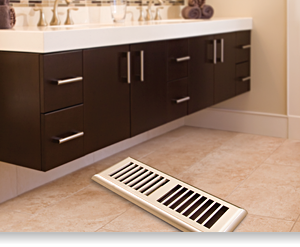
Registers are covers or grates placed in the air flow openings in your house. They give you control over volume and direction of the air entering a room. A floor register works by pressing the lever on the floor register's damper box to open shutters that direct air into the room. By pressing the lever on the floor register's damper box the other way, the shutters close reducing the flow of air.
Characteristics of registers
- They include a damper that provides control, to direct and diffuse the amount of air that enters a room.
- Registers may direct air in one, two, three or four different directions depending on the type of register.
- They are installed on floors, walls and ceilings.
- If they are blocked the temperature in a room can be greatly affected.
- Most registers have a single valve or a multi-shutter damper.
What is a grille?
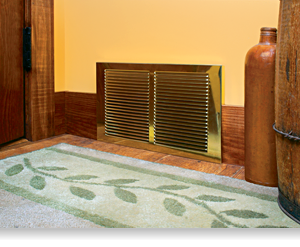
Grilles are the vents through which air is pulled out of a room for circulation back to the central heating or cooling unit. Grilles do not have the damper controls found on registers. Imperial Grilles are installed in cold air return ducts.
Characteristics of grilles
- They have no damper to close off the flow of air.
- They may be located in floors, ceilings and walls.
- They provide return air circulation within a room; where unobstructed flow is required for heating/cooling system efficiency.
- You may have several small grilles located throughout your home or one large central grille installed near the furnace.
Troubleshooting: find solutions to common dryer venting problems

If you have one or more of these problems:
- My laundry room seems hotter and more humid than usual.
- My clothes take an unusually long time to dry.
- My clothes are hotter than usual at the end of a drying cycle.
- The damper on my outside exhaust vent hood does not open fully when the dryer is operating.
- The outside of my dryer seems unusually hot.
Actions to take
- Unplug the dryer, if you have a gas dryer, shut off the gas.
- Inspect your duct system for air leaking, blockage and/or damage.
- Inspect your vent hood from the exterior of your home for damage or blockage.
Possible solutions
- Clean the dryer vent pipe of lint and debris. Most of the lint or debris built-up will be at the end of the duct connections. Imperial brushes can be used to clean these areas.
- If the duct system or vent hood is damaged, replace them.
- If the connections are loose, adjust them.
- If your problem has not been solved, get your dryer checked by a professional
How to replace an existing register or grille
How to replace an existing register or grille
When installing new floors, many overlook replacing existing floor registers with ones that complement their new flooring and home decor. Fortunately, this is something anyone can do themselves.
Step-by-step
- Determine the size of the register.
Remove the original vent cover to expose the ventilation opening. Measure the length and width of the opening. Subtract 1/8" to 1/4"(depending on how square the opening is) and this is the inside dimensions for the new floor registers. Reinstall old register until you get the new ones. - Select an Imperial Register.
Imperial Registers are designed to fit the standard openings used in most homes. A wide variety of designs and finishes are available. - Unpack and Install.
Imperial Registers come fully assembled. Simply drop into place.
To replace a ceiling register
Replacing a ceiling register is just like that of the floor register except for a couple of steps:
- After the initial size check, make sure that there is sufficient wall or ceiling space at the short ends of the wall register to allow for you to attach it to the wall with screws that are provided with your new register.
- Final installation requires a screwdriver to attach the wall register to the wall or ceiling with the screws provided
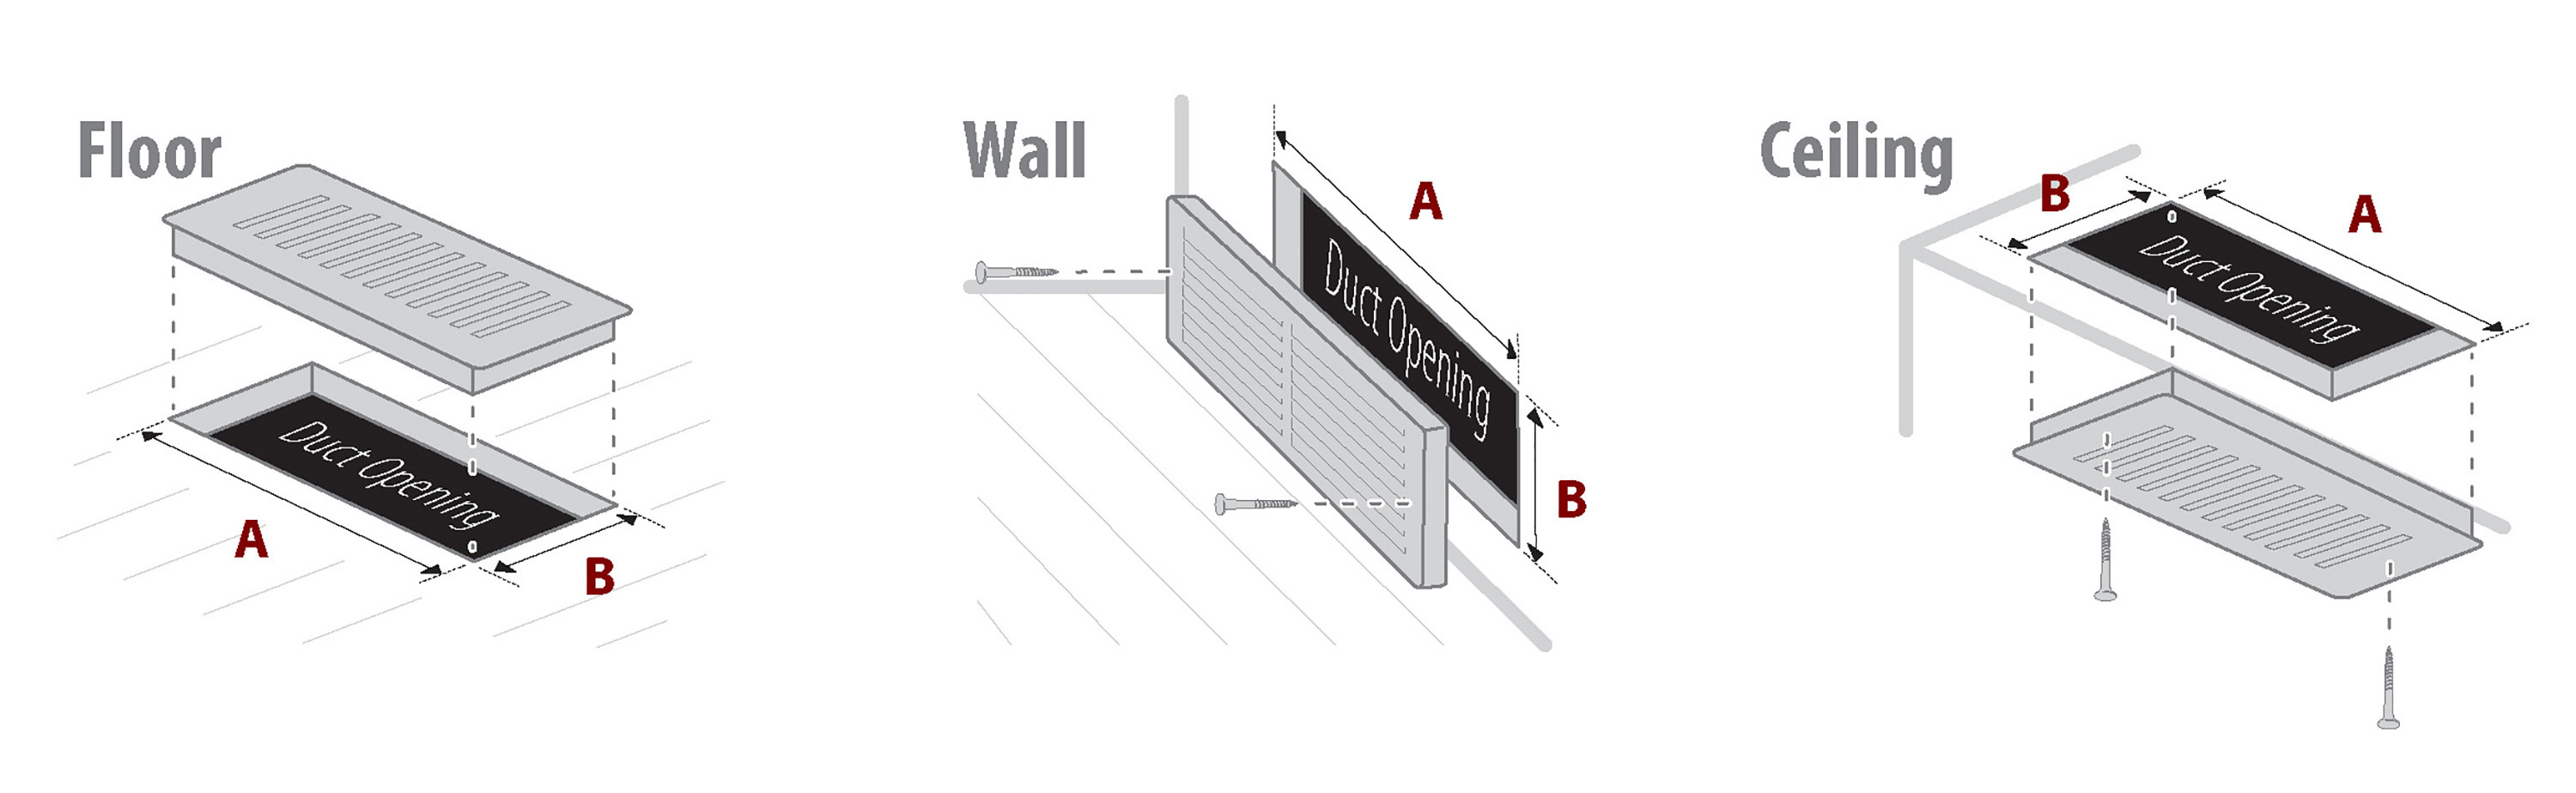
Measure the opening…NOT the register!
How to create an new opening for a register or grille?
How to create an new opening for a register or grille?
If you are expanding your heating and/or cooling system, we recommend you consult an HVAC technician about placement and installation.
If you are simply adding a register, say for distributing heat from a wood stove, following these instructions should help:
What you'll need:
- Heating duct
- Tape measure
- Pencil
- Saw
- Imperial Register or Grille
Step 1 - Locating and measuring
Measure the rough opening as specified on the Imperial Register or Grille packaging. Check for joists and other potential obstructions before locating the register or grille. When you’re doing this, you need to be sure that it sits square and an ample distance from the wall. Draw the shape of the opening on the existing floor.
Step 2 - Sawing
Next, saw through the subfloor and the hardwood floor in your room. If you’re putting carpet in the room, you will need to fit the floor heating vents before you install the carpet. Using a reciprocal saw, cut through the floor and cut roughly around the rectangle you’ve made where the floor heating vent will fit through the floor. You don’t have to be exact with this because the frame of the Imperial Grille will cover any irregularities.
Step 3- Fitting the vent
An Imperial Floor Register or Vent uses its own weight to stay in place on the floor, so just insert into opening
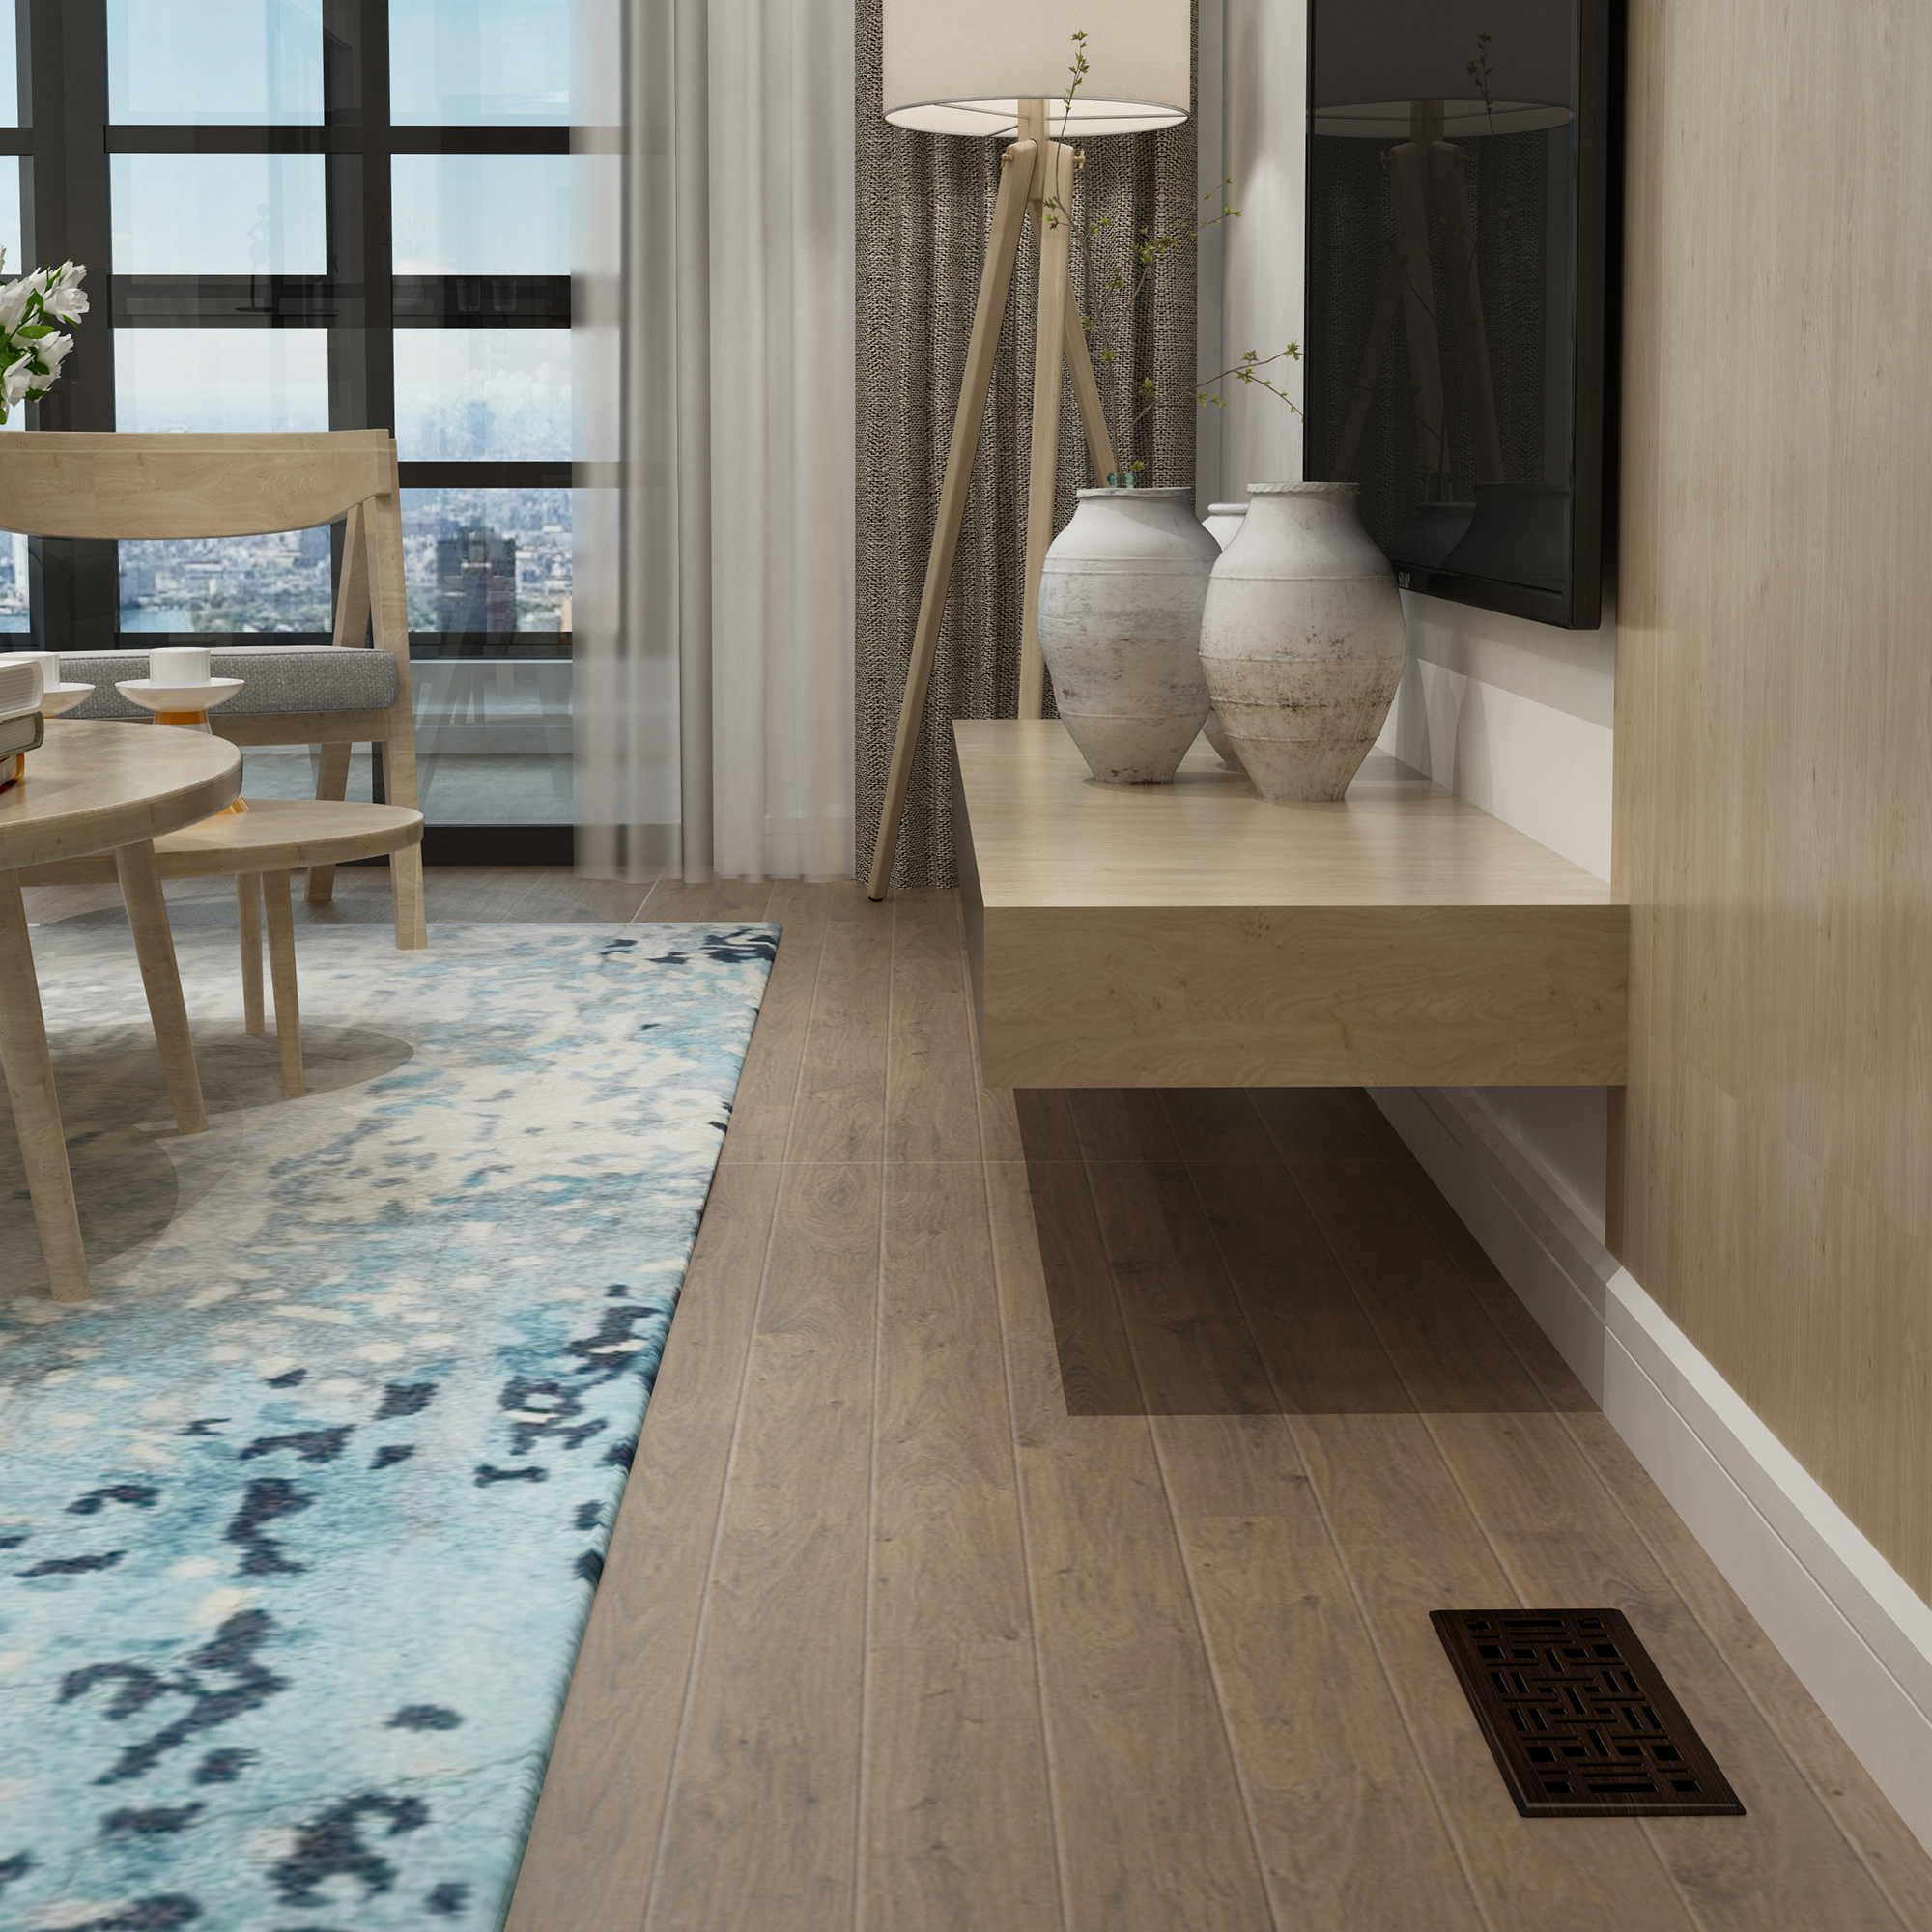
How to deflect air where you want it
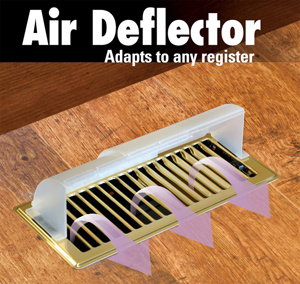
Since hot air rises, you might want to direct it to the center of a room
The Imperial Pop-Up Register is perfect for floor registers that are covered by curtains or furniture. When not covered, it works like a typical floor register. But when the curtains are closed and cover the register, simply close the register top, and pop it up to redirect the airflow to the side, for optimum heating or cooling efficiency!
Imperial Pop-Up Registers also features a 100% shut off damper that stops the airflow completely, a handy feature for total control over airflow or when airflow is not required.
The Imperial Pop-Up register is easy to clean, rust proof, scratch resistant and ideal for light humidity areas. It can be installed in both floor and ceiling application with heating and cooling systems.
The Imperial Air Deflector is also an alternative.
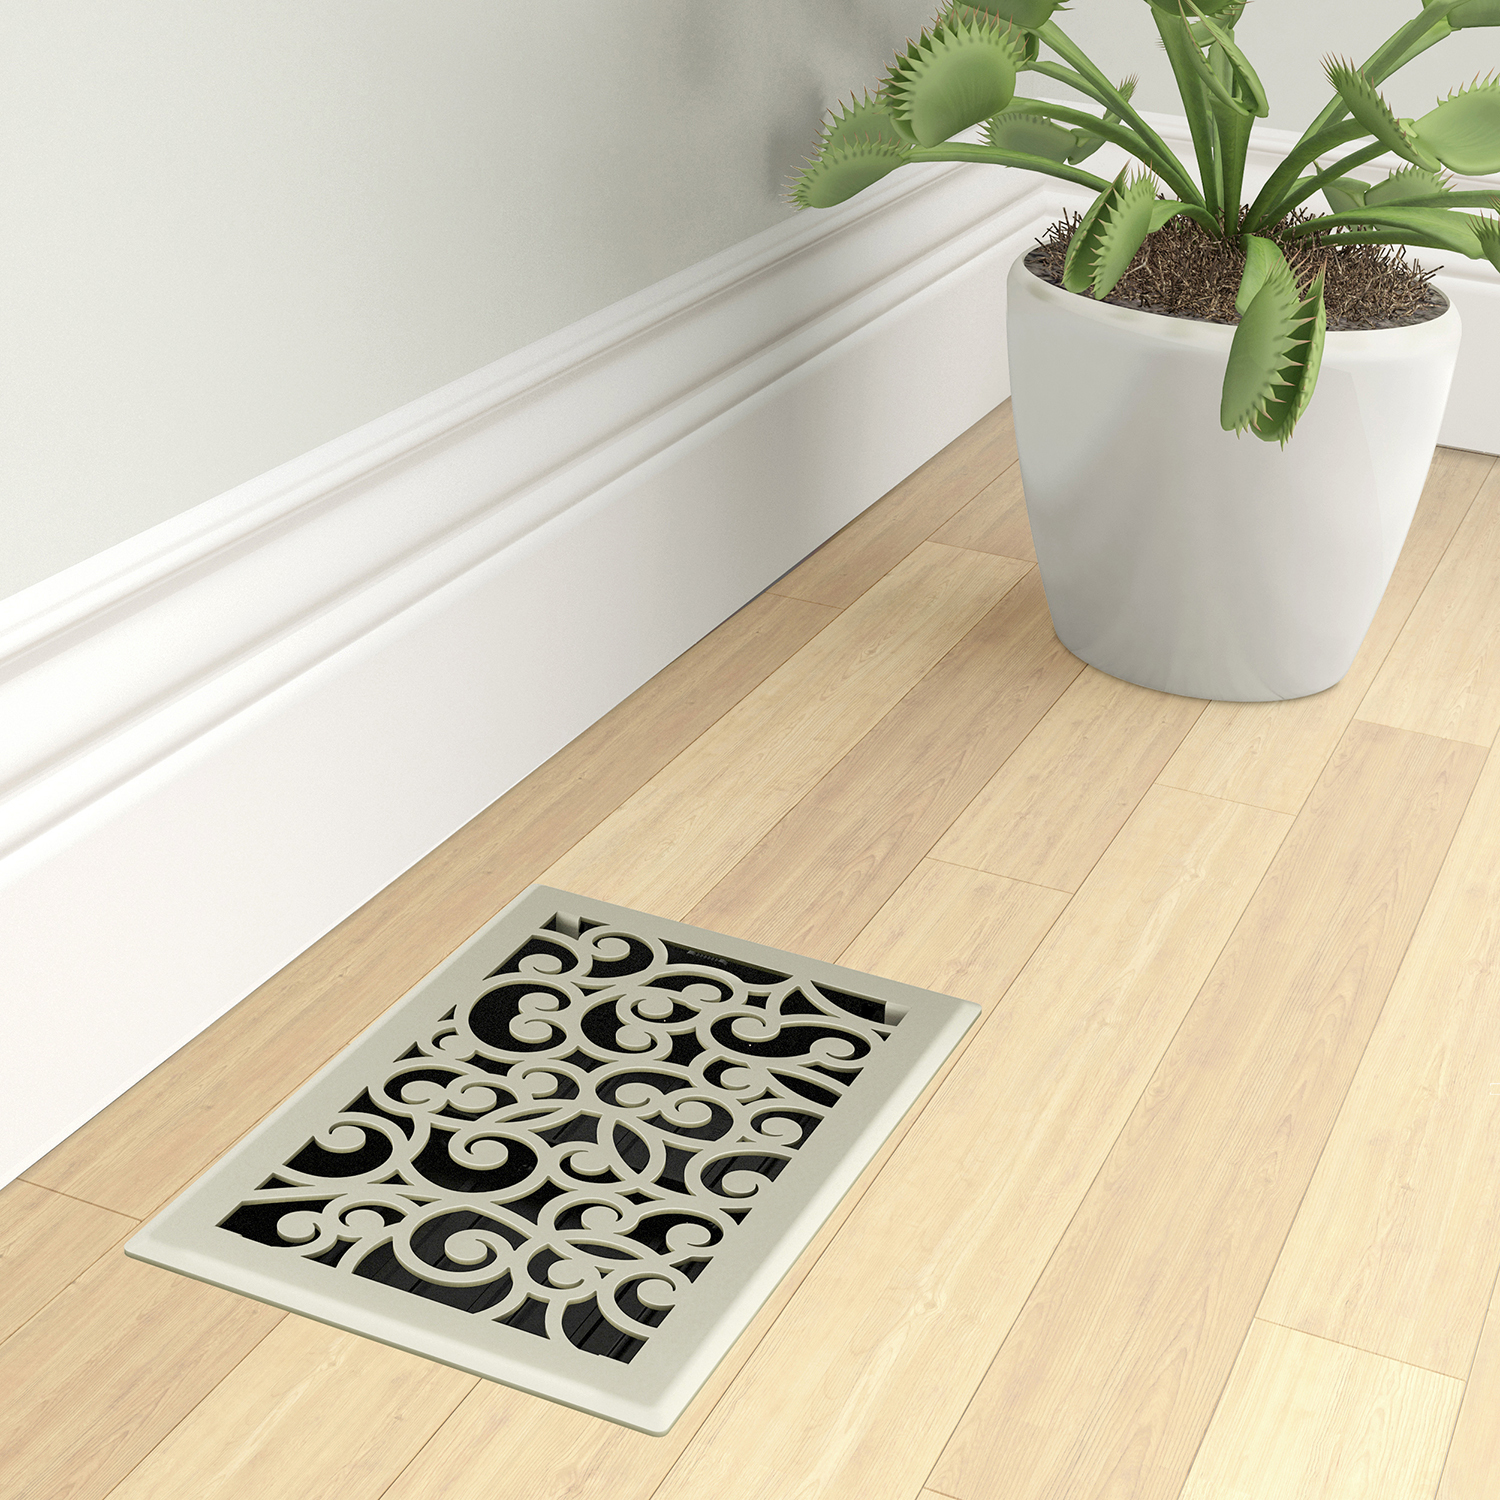
This is one of the easiest and inexpensive home improvements you can make
This is one of the easiest and inexpensive home improvements you can make
When it comes to decorating, one area of the home that is often overlooked or passed over are heat registers.
These vent coverings are easy to forget about, as they can seem like such a basic part of your home. The floor registers and grilles that originally came with your home have probably seen better days. Using decorative registers in your home can really help improve the overall look of your new or current room design.
If you are installing a new floor, you should add an attractive finishing touch with new registers and/or grilles. Imperial Floor Registers add style, class, richness, quality, originality, and high value to any home. They come in a variety of materials, finishes and styles for a perfect match or distinctive detail.
Floor registers give you added control over air circulation and protect you, your kids, and your pets from any harm from open-air ducts.
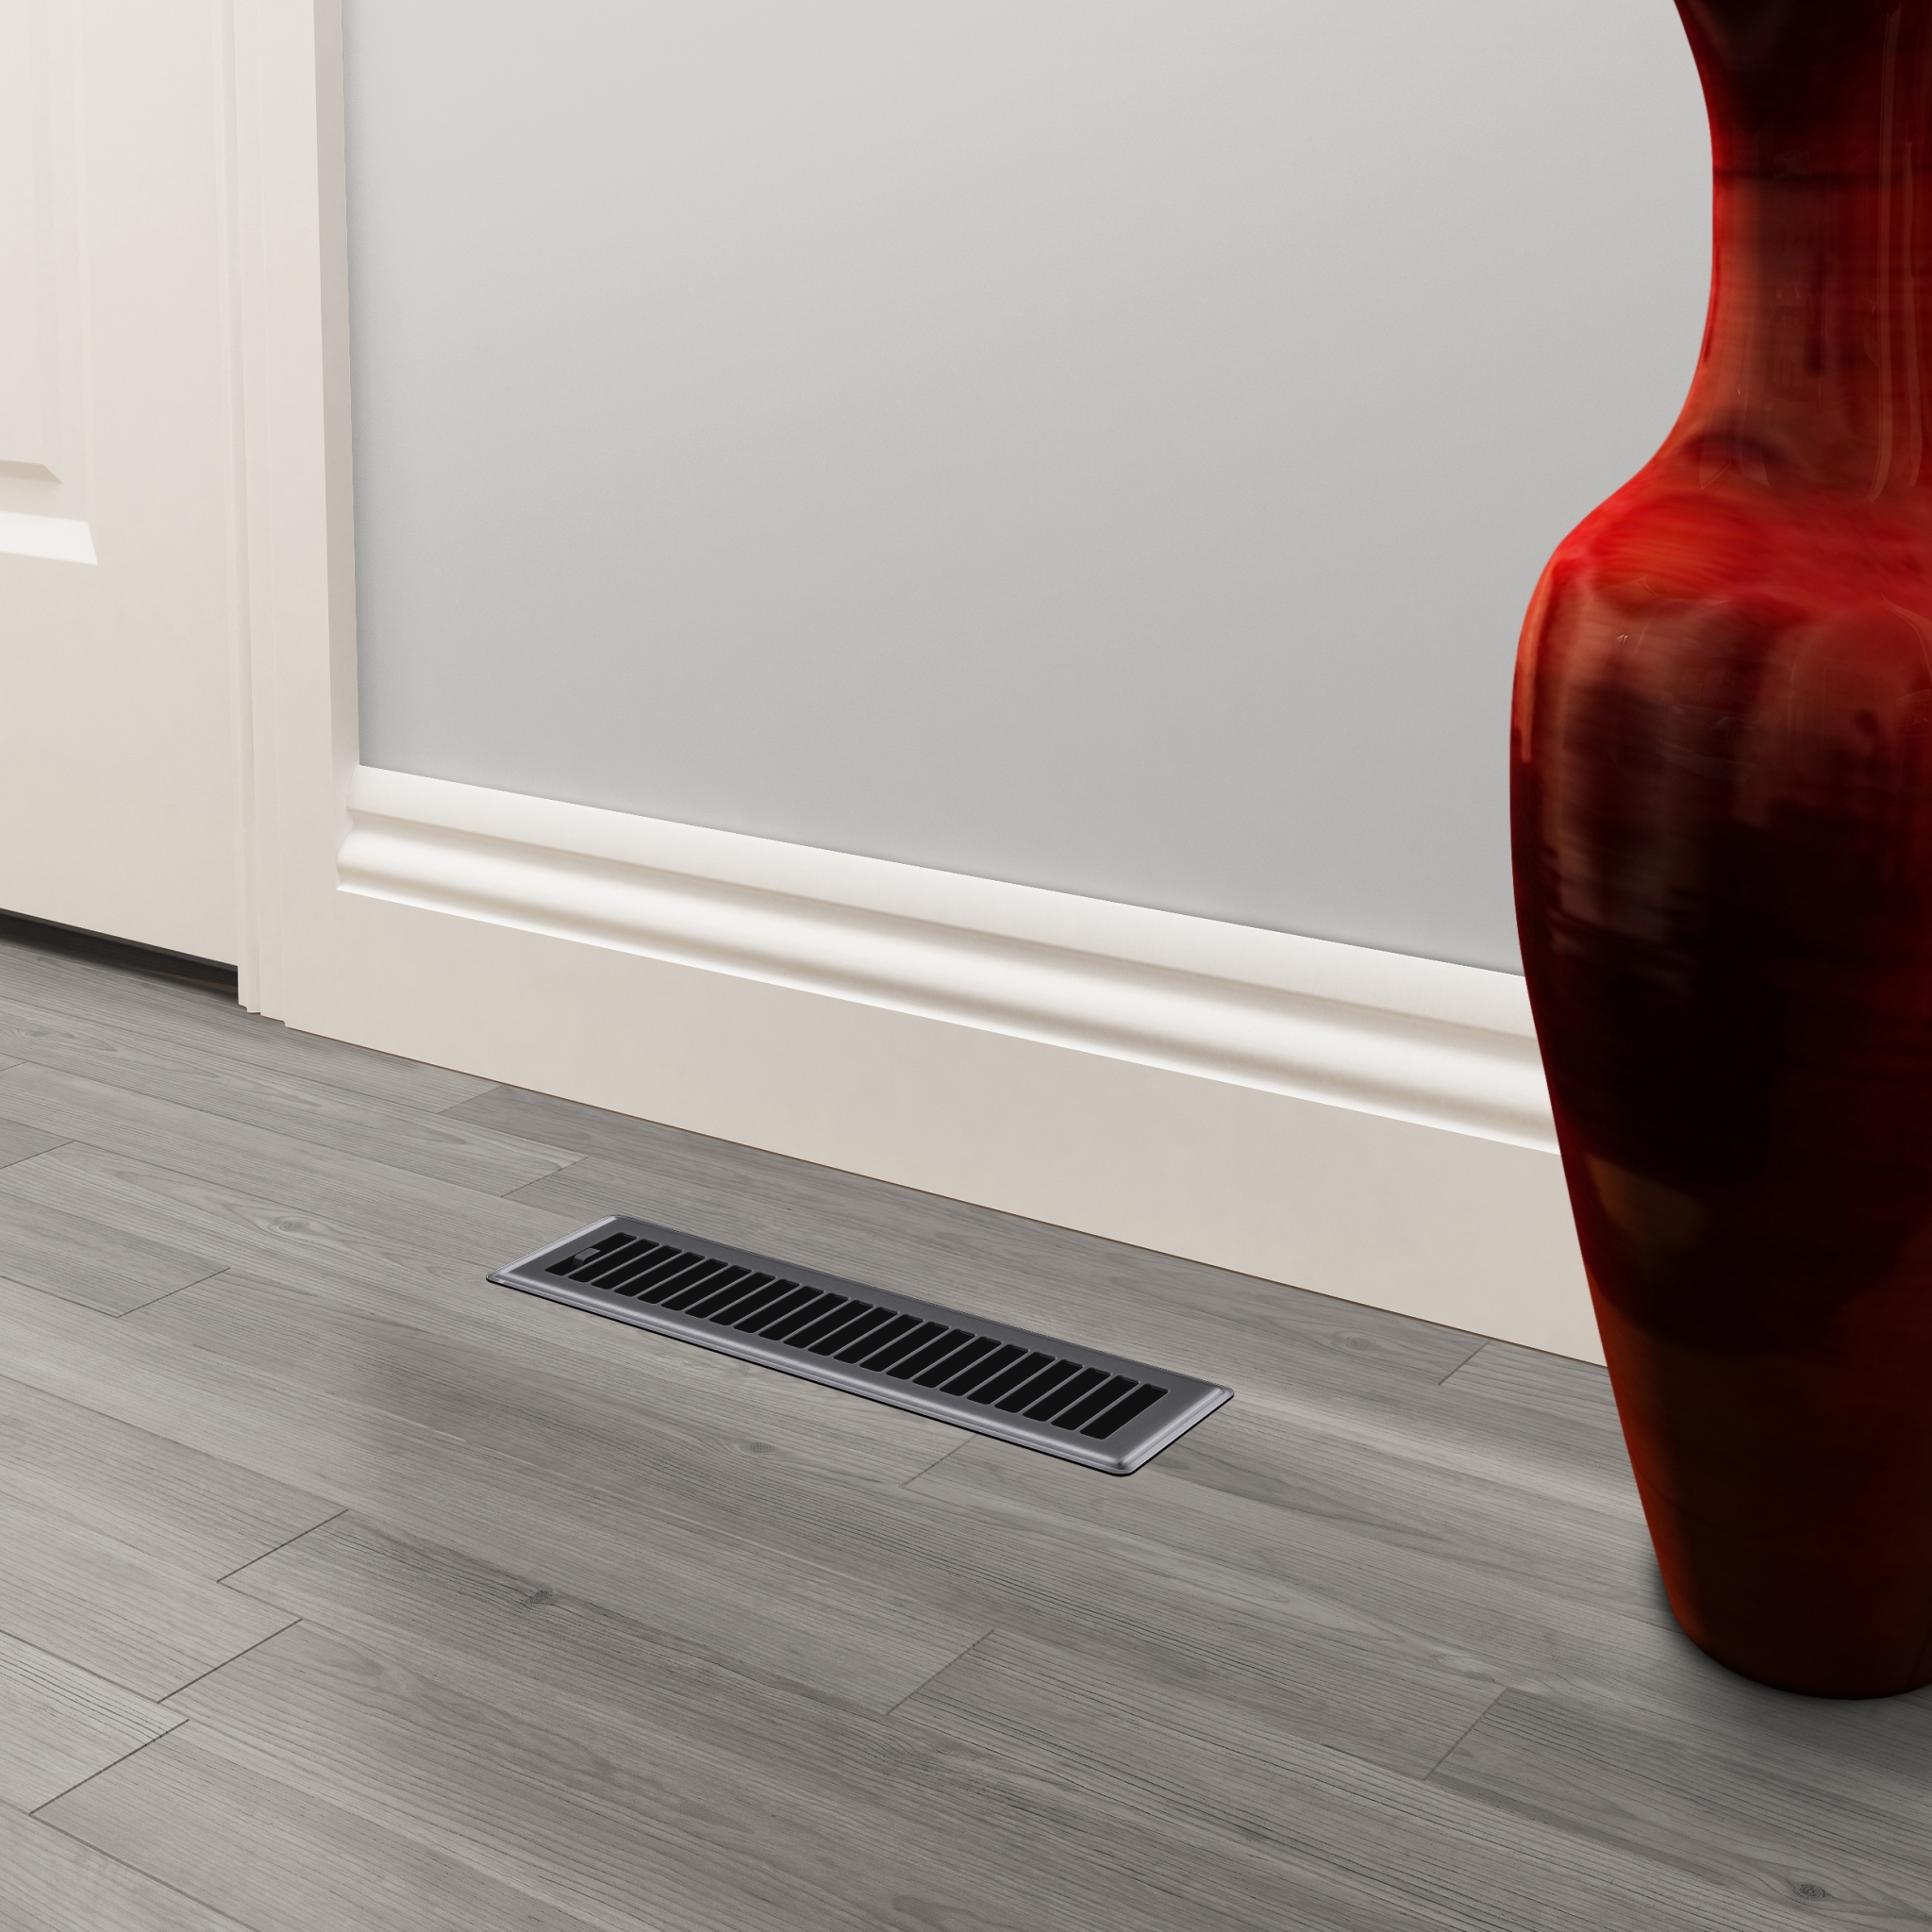
Imperial offers a broad selection of registers
Imperial offers a broad selection of registers
- Decorative Imperial Floor Registers come in a variety of materials, finishes and styles to fit perfectly with traditional, modern and elegant décor.
- For something with a warmer or homier touch, consider Imperial natural wood registers available in light, pre-finished oak or unfinished where you can stain yourself.
- Imperial registers designs range from very basic slotted openings to elaborate patterns and designs.
- Pick colors or finishes to match each room of the house


How to snap stove pipes together
Recommended Stove Pipe Assembly

For more details on how to assemble Imperial single-wall stove pipes, please refer to the instruction sheet.
Selection Tips
Selection Tips
- Use Imperial Floor Registers to accent a room with a style and finish that matches the scheme of that room.
- Rooms with carpeting will use a different floor register that a room that has wood floors such as typical dining room and kitchen areas. By choosing a decorative register to match that specific type of flooring, you will achieve the best overall look for the room.
- If you have hardwood flooring in a certain room of your home that has been stained with an unknown color, simply get an unfinished wood floor register and have someone match a stain to your floor.
- Match the floor register to other items in the room like cabinets, shelving and wallpaper.
- Match ceiling and wall grilles to blend with the room’s new look.
- In most cases, a straightforward design with blended accessories will give the most practical look that you and the rest of your family can live with for years to come.
Clothes dryer performance
Planning points for you dryer venting system
- When planning a new dryer vent system, always select the route that will provide the straightest and most direct path outdoors.
- Plan the installation to use the fewest number of elbows and turns.
- Elbows allow the dryer to sit close to the wall without kinking and/or crushing the transition duct.
- The male (crimped) end of each section of rigid metal or flexible metal (semi-rigid) ducting must point away from the dryer.
- Rigid metal duct joints should be made air and moisture tight by wrapping the overlapped joints with duct tape or aluminum tape.
- Duct that runs through an unheated area or is near air conditioning should be insulated to reduce condensation and lint buildup.

| Universal Pest Guard | Louvered Vent Hood with Plastic Guard | Preferred Vent Hood with Removable Guard |
|
|
|
Dryer installation applications

Tips on duct installation
Prior to installing a duct system, you should
- Sketch out your layout.
- Make a checklist of the duct, pipe and fittings needed to complete your installation.
- Estimate the type of joints required.
- Consult your store representative for assistance.
- Check local building codes in your area before planning your installation.
About airflow
It is important to maintain a neutral pressure in the home by having balanced airflows between the supply and return system.
- Airflow can be restricted by certain fittings and too many turns in a system.
- Dampers allow for adjustments of air distribution.
- Reducers can also balance your system.
- Use the correct pipe size for your system.
A too large or too small fitting can hamper airflow.
Branching
The total amount of air that your furnace or air conditioning system can move stays the same even if you add a branch.
Whenever you branch, you must reduce the size of the pipe to maintain air velocity.
- For each branch of ductwork, determine your start point and your end point.
- The new supply line should always be drawing off a main air supply duct.
- Use a take-offwhen your start point is a rectangular main duct.
- Use a teeor wyewhen your start point is a round main duct.
Tees split, but do not reduce, and an appropriate reducer must be added. - Use a boot when your end point is at a room floor, wall or ceiling.
- Use elbows to make any necessary turns between the start point and end point.
A 90º round adjustable elbow can be adjusted to make any angle from 0º through 90º.

A few more tips
- Sheet metal ducts must be insulated when located in an unconditioned space.
- Try to avoid cutting by using full lengths of pipe.
- Crimps must be placed so that the airflow exits at the crimped end.
- Never locate ducts at the end of the trunk line run.
The last take-off run should be located 12" - 18" from end. - Always stagger take-off ducts by 12" to maintain pressure.
- When connecting ducts, cut an accurate hole; fasten components mechanically with at least one screw per side and seal leaks using a high-grade tape or preferably mastic.
- It is recommended that all register boxes be sealed to the drywall or floor with caulking or mastic.
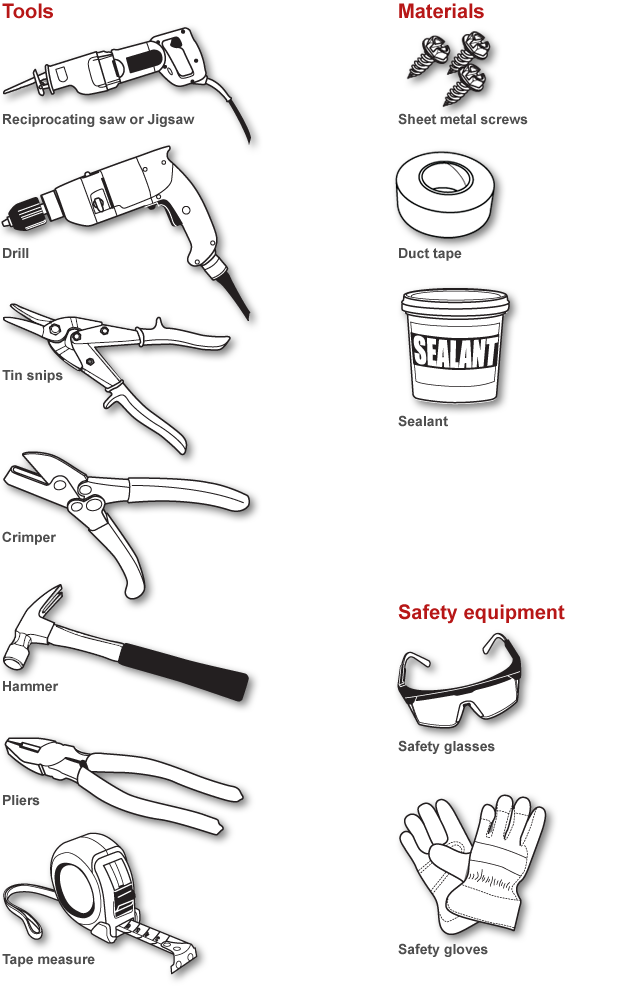
Some tools and materials you may need
Terms and definitions you need to know
Terms
Basement system
The main duct that comes out of the plenum is rectangular. Air is directed up into the living area
Branch duct
Smaller sections of pipe that carry air from the main duct to individual rooms.
Ceiling system
The main duct that comes out of the plenum is round. Air is directed down into the living area.
Crimper
Tool shaped like a pair of pliers, which is used to make corrugations in the end of a sheet metal duct to reduce its size.
Forced air system
A system of heating or air-conditioning in which the air is forced through a chamber connected to distributing ducts.
Main duct
A large duct that comes directly out of the furnace or central air source or plenum. It is sometimes called a trunk duct.
Plenum
HVAC system accumulation and distribution chamber for connection of ducts.
Return duct
The central heating or cooling system contains a fan that gets its air supply through the return ducts. These ducts should ideally be installed in every room of the house.
Stack duct
A rectangular duct that is used between wall studs to vent supply and return duct runs.
Supply duct
The ductwork that carries air from the air handler to the rooms in the house.
Oval duct compared to round duct
Oval duct provides a more efficient alternative to rectangular duct in application where round can't be used. It is manufactured with the same techniques used to make round duct. As a result, oval duct shares many of the performance characteristics of round duct.
Do's & Don'ts about ducts
Do's & Don'ts about ducts
Do's
- To reduce the risk of fire, the dryer MUST BE EXHAUSTED OUTDOORS.
- Use only 4" rigid metal or UL-Listed flexible metal (foil-type or semi-rigid) ducting to connect the dryer to the home exhaust system.
- For best drying performance, rigid metal transition duct is recommended.
- If rigid metal duct cannot be used, UL-Listed flexible metal (semi-rigid) duct should be used.
- UL-Listed flexible metal (foil-type) duct should be used only in installations where rigid metal or flexible metal (semi-rigid) ducting cannot be used.
- Flexible metal (foil-type) duct must be fully extended with excess duct removed to avoid sagging and kinking.
- Flexible metal (foil-type or semi-rigid) ducting is acceptable only if they are accessible for cleaning.
- Total length of UL-Listed flexible metal (foil-type or semi-rigid) ducting cannot exceed 8’.
Don'ts
- Never install UL-Listed flexible metal (foil-type or semi-rigid) duct in walls, ceilings, floors or other enclosed spaces.
- Do not assemble duct using duct tape, screws or other fastening devices that extend into the interior of the duct. These fasteners can accumulate lint, creating a potential fire hazard.
- Do not use duct longer than required. Longer duct systems can accumulate lint, creating a potential fire hazard.
- Do not crush, kink or collapse duct.
- Avoid resting the duct on sharp objects.
Do's & Don'ts about dryer exhaust
Do's & Don'ts about dryer exhaust
Do's
- Exhaust vent hood must be installed at least 12" from the ground or any object that may be in the path of the exhaust air.
- Use caulking compound to seal exterior wall opening around exhaust vent hood.
- The exhaust vent hood should cap the vent system to prevent rodents and insects from entering the home.
- Before connecting replacement duct to the exhaust outlet of an existing dryer, make sure the exhaust port is clean and the exhaust vent hood is not plugged with lint.
- Provide an access to the exhaust system, especially at turns and joints, so system can be inspected and cleaned at least once a year.
- Observe all governing codes and ordinances.
Don'ts
- Do not terminate dryer exhaust in a chimney, a wall, a ceiling, gas vent, crawl space, attic, under an enclosed floor, or in any other concealed space of a building.
- Never terminate the dryer exhaust into a common duct with a kitchen exhaust system. A combination of grease and lint creates a potential fire hazard.
Floor Register Size Selection Guide
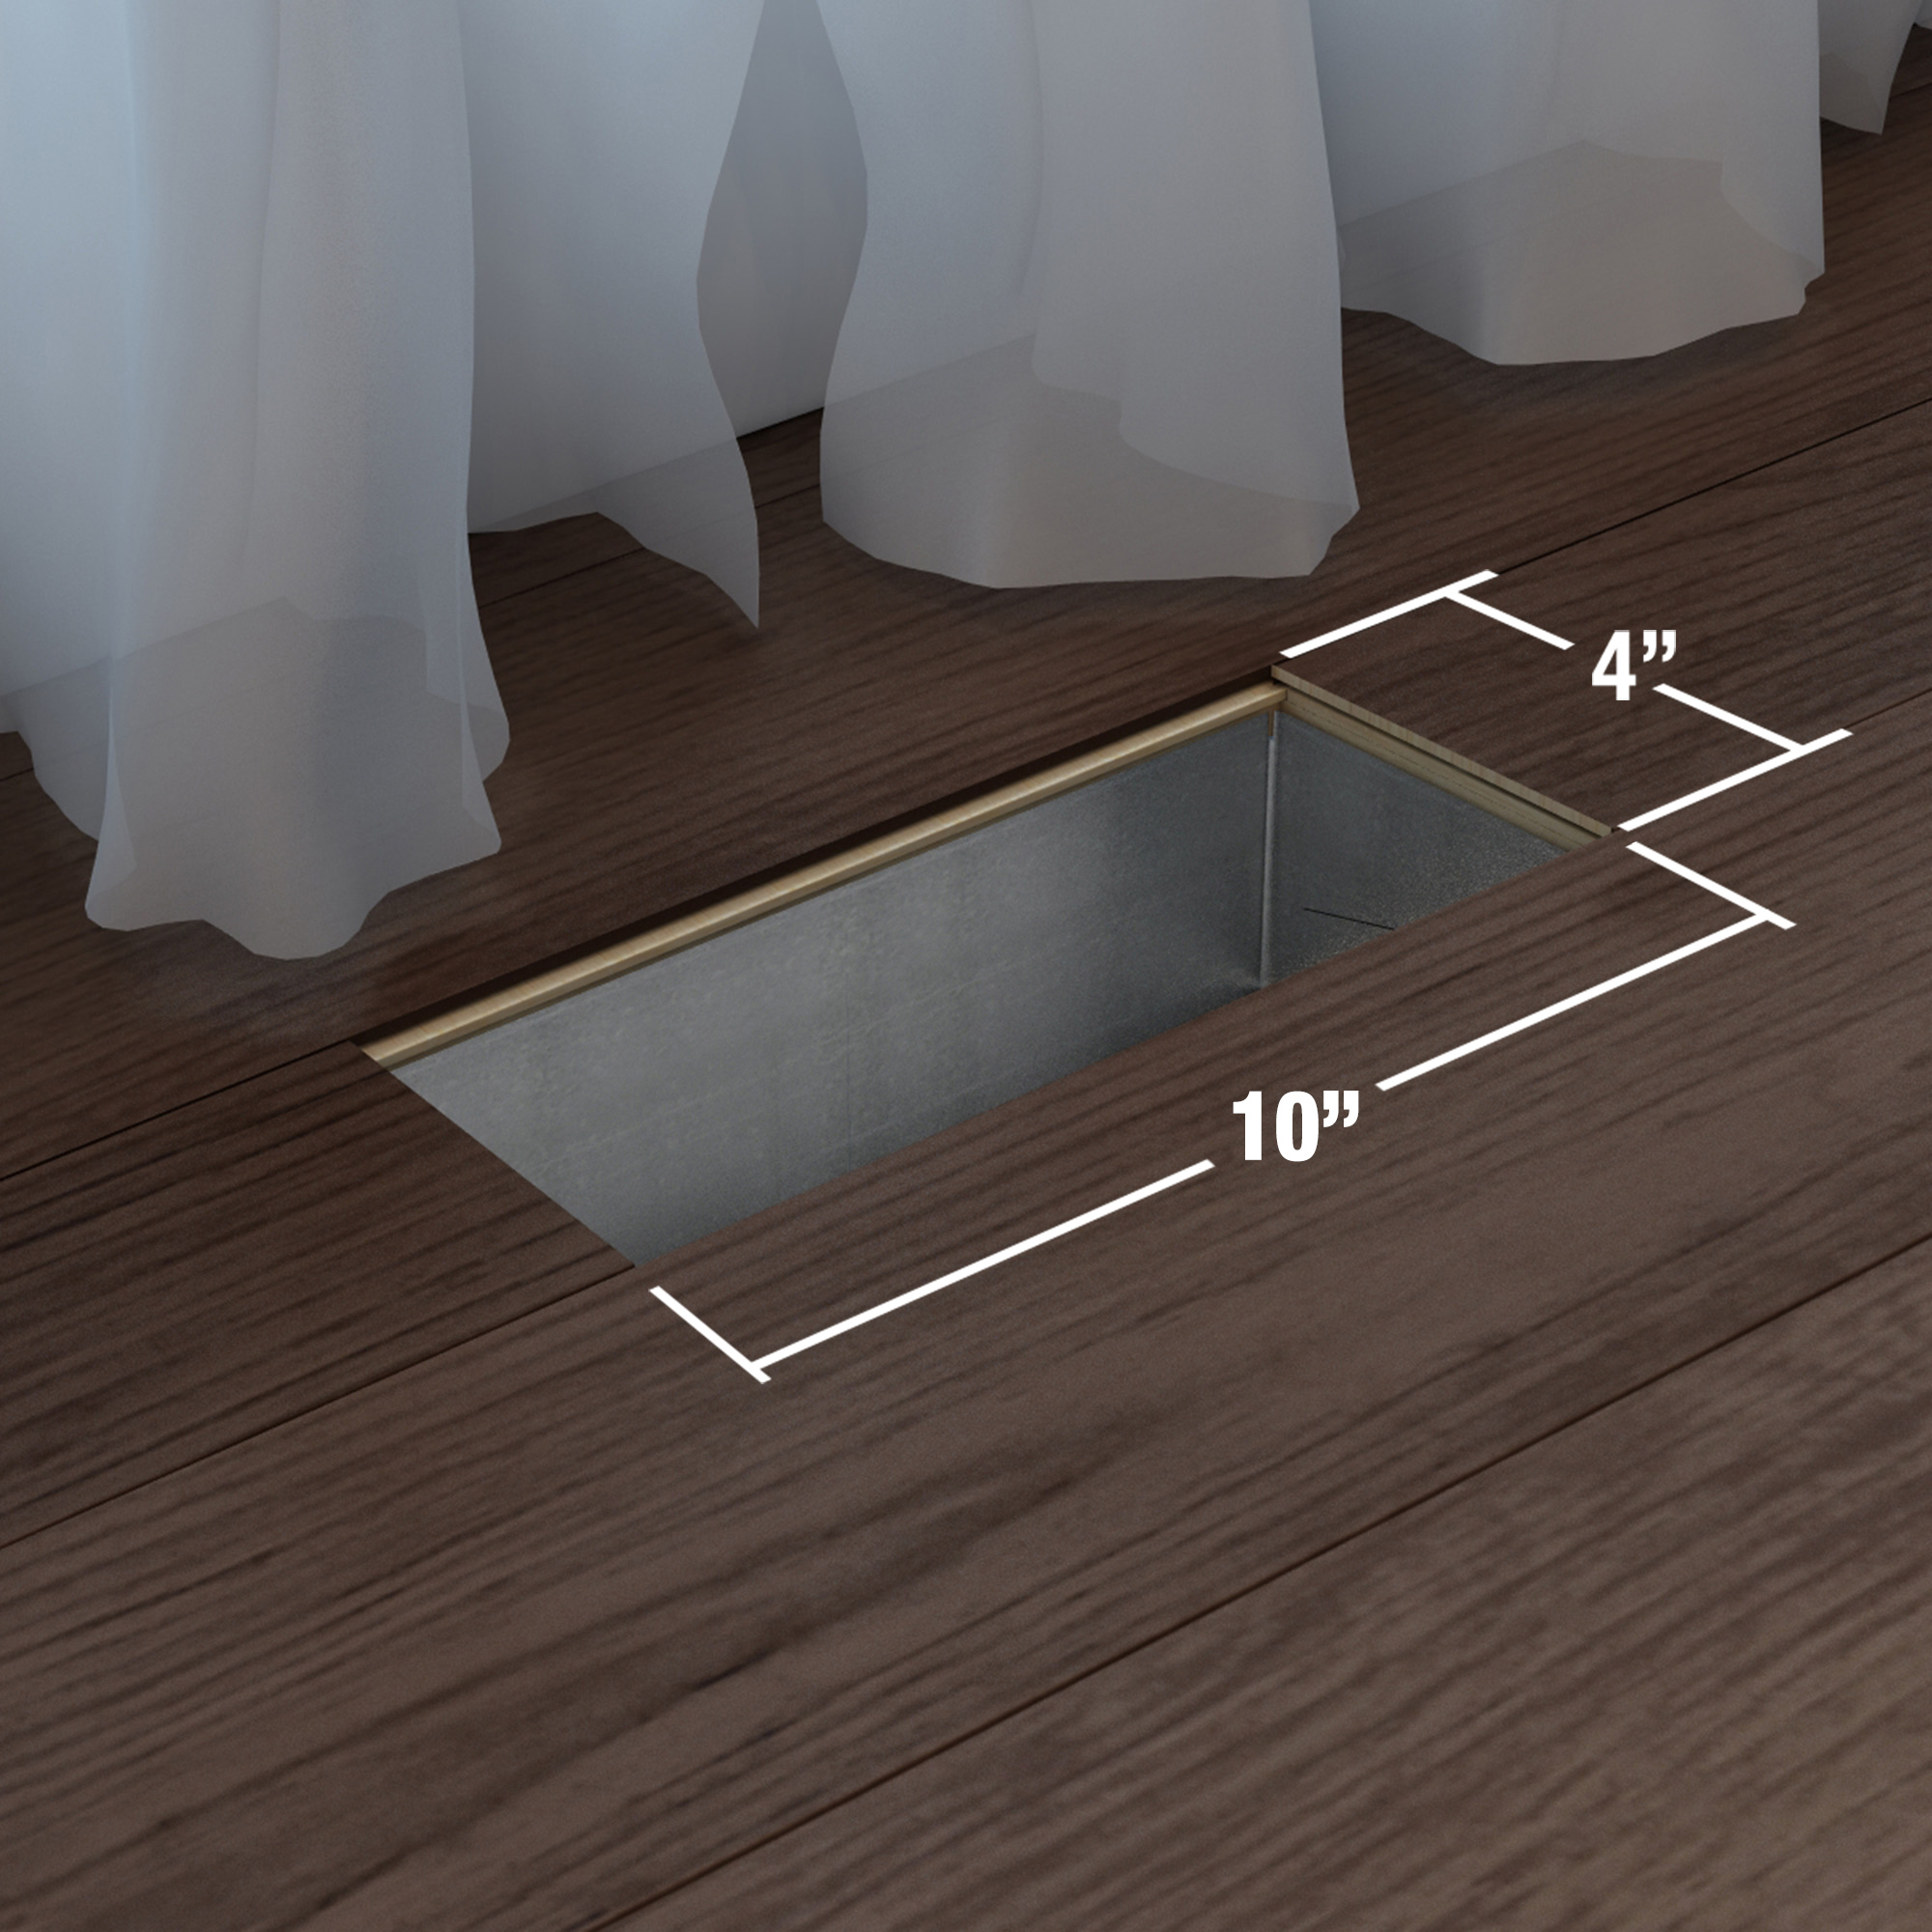
Register Size Selection Guide
Applicable to floor, ceiling, and sidewall/ceiling registers
- Register sizes are based on the duct size
- Measure the duct opening in the floor before ordering or purchasing your register
- Do not use the top plate size as a reference
Choosing the correct brush type for your chimney

POLYSWEEP POLYPROPYLENE BRUSHES are economical brushes used in clay and stainless chimneys to remove the minor build-up of creosote in chimneys.
SUPERSWEEP PREMIUM WIRE BRUSHES are stiff wire brushes used in clay and masonry chimneys. The wire construction is designed to remove significant creosote build-up in chimneys.
PELLET STOVE BRUSHES are rigid fiber brushes made of Tampico used to clean stove flues and clothes dryer vents.
What is the difference between soot and creosote? Are they not the same?
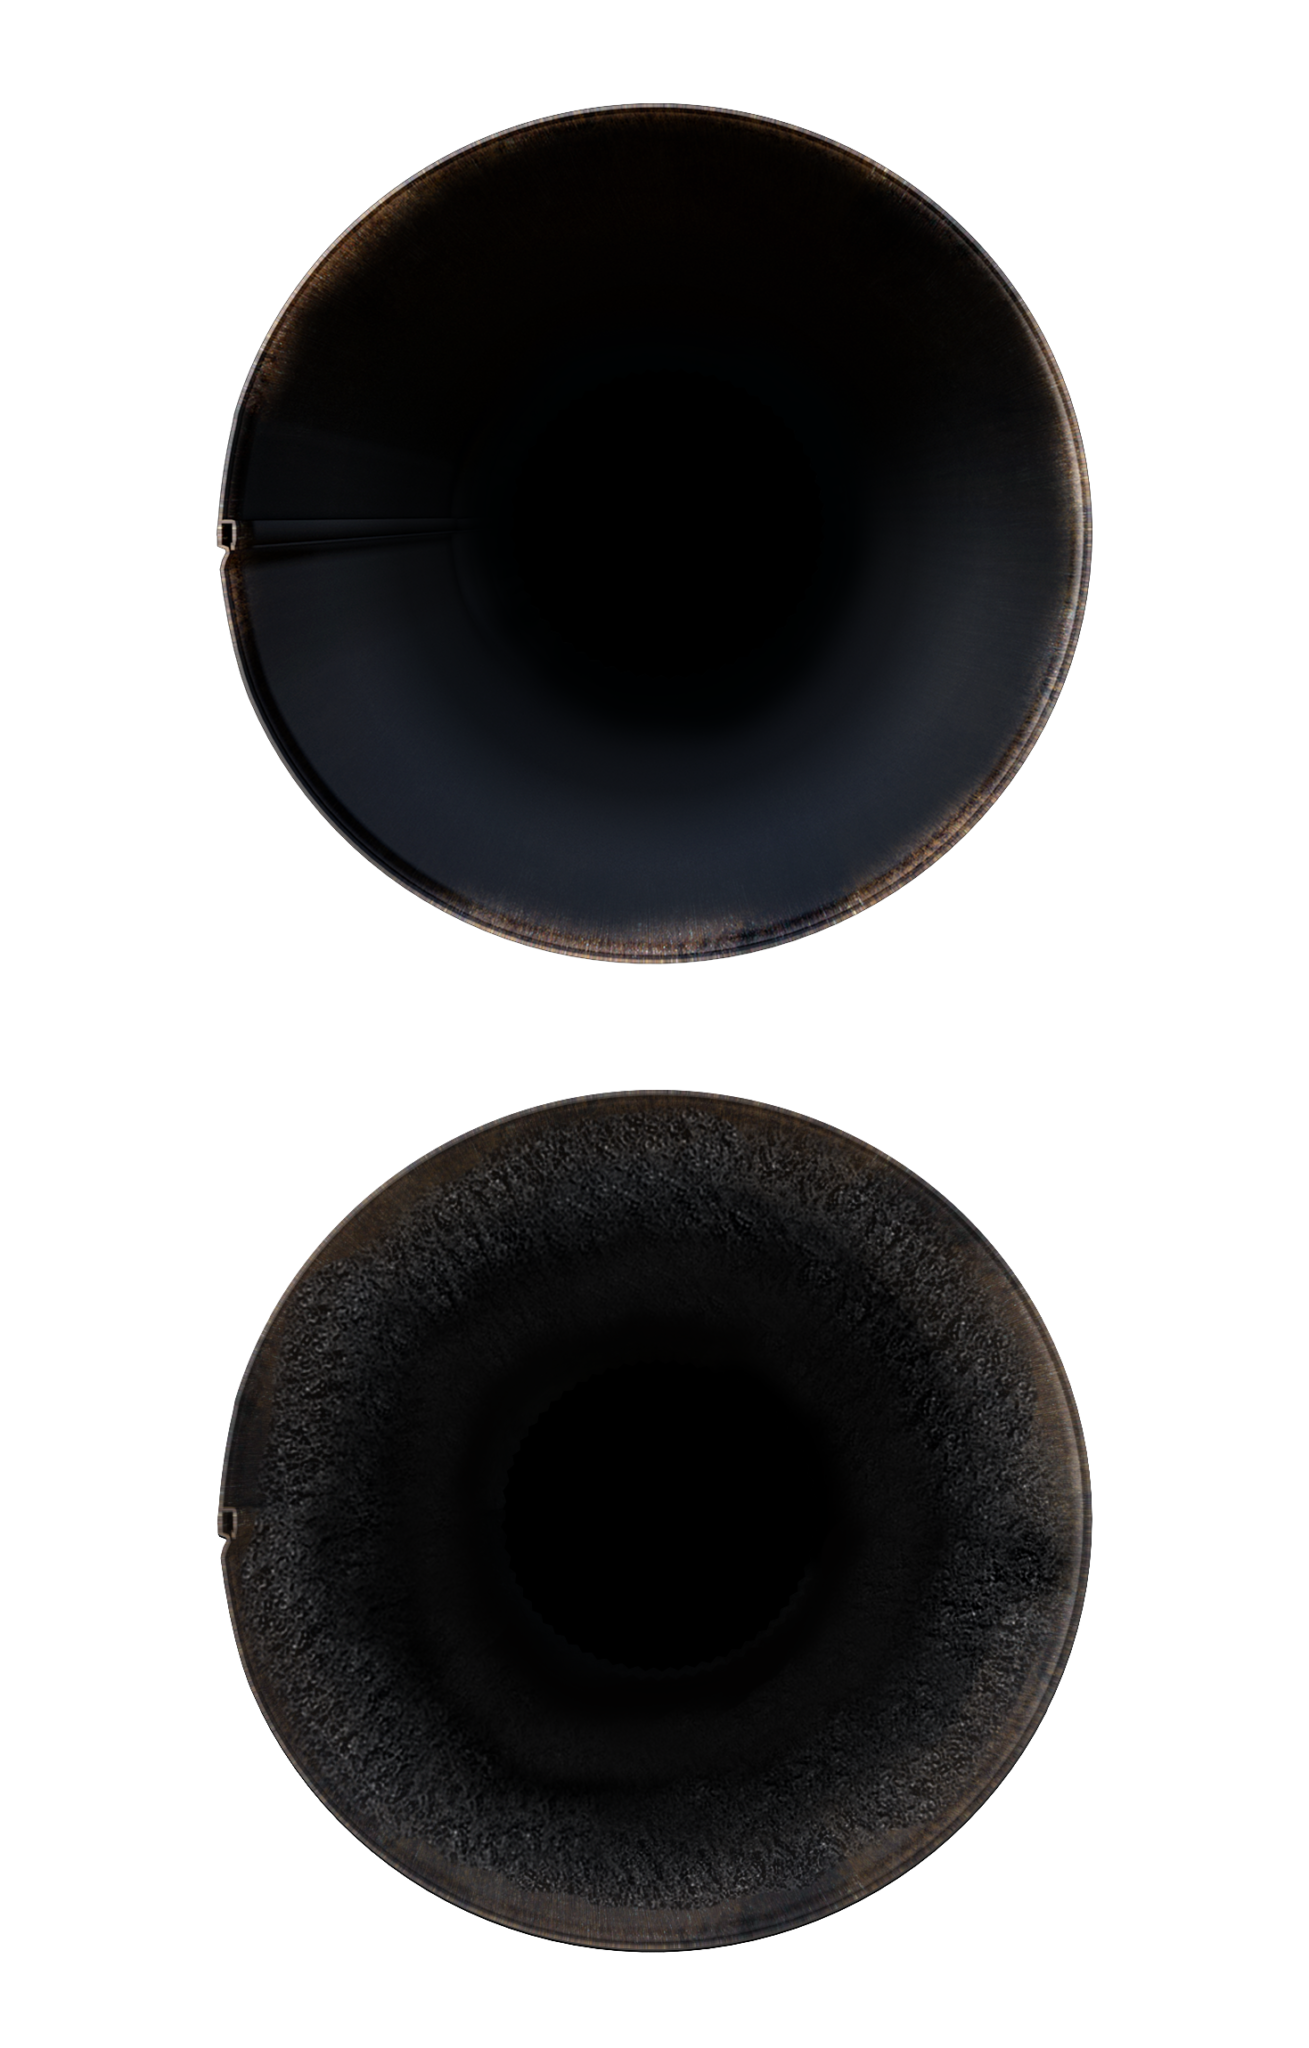
Soot vs Creosote
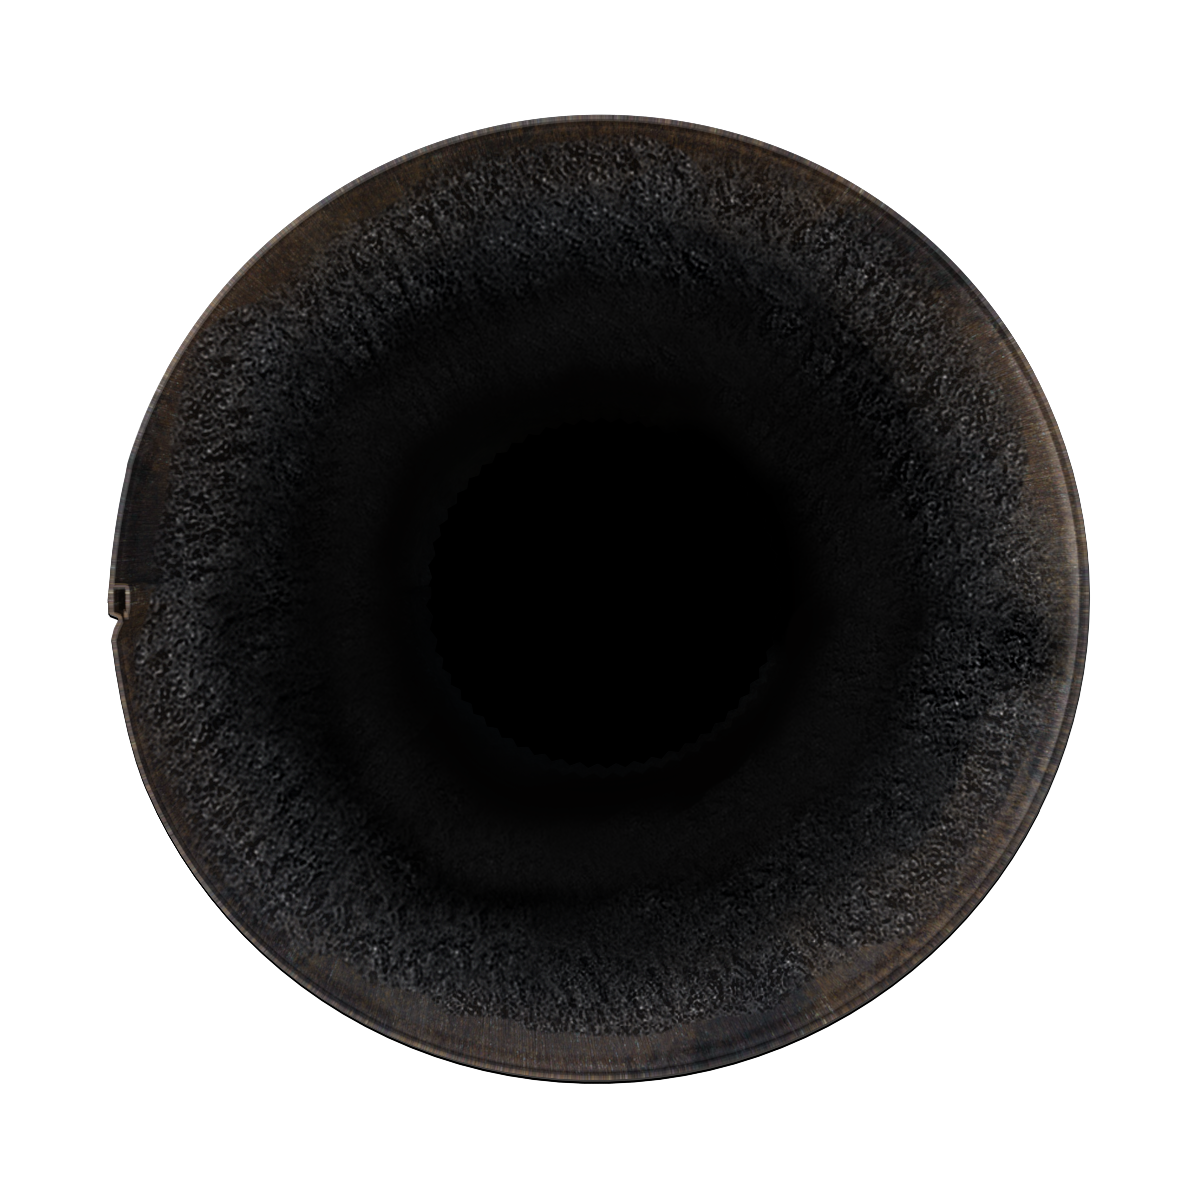
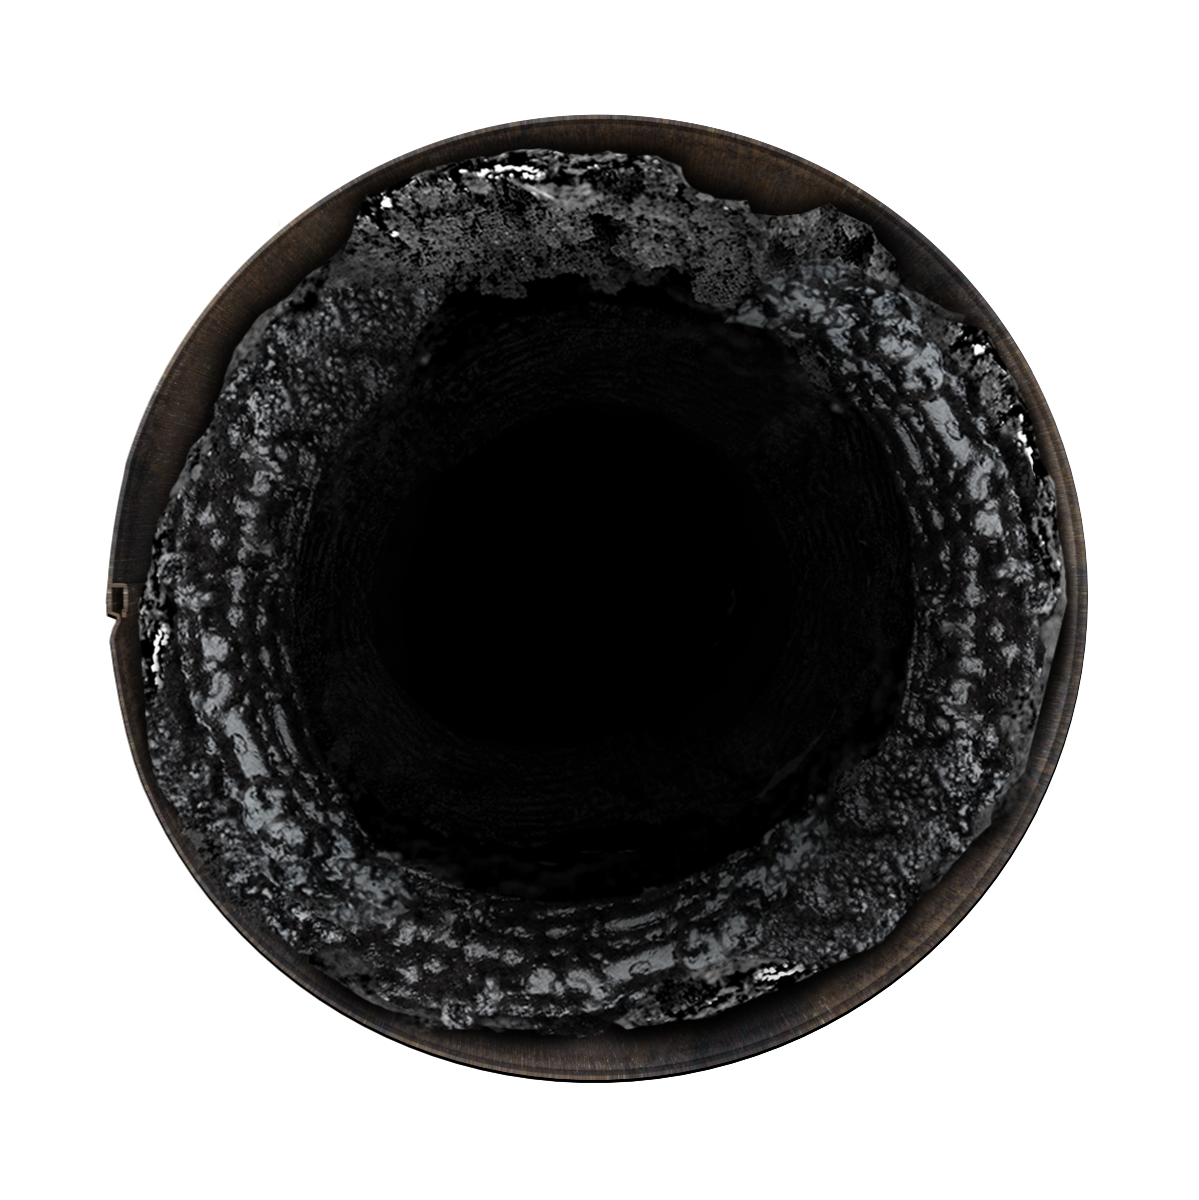
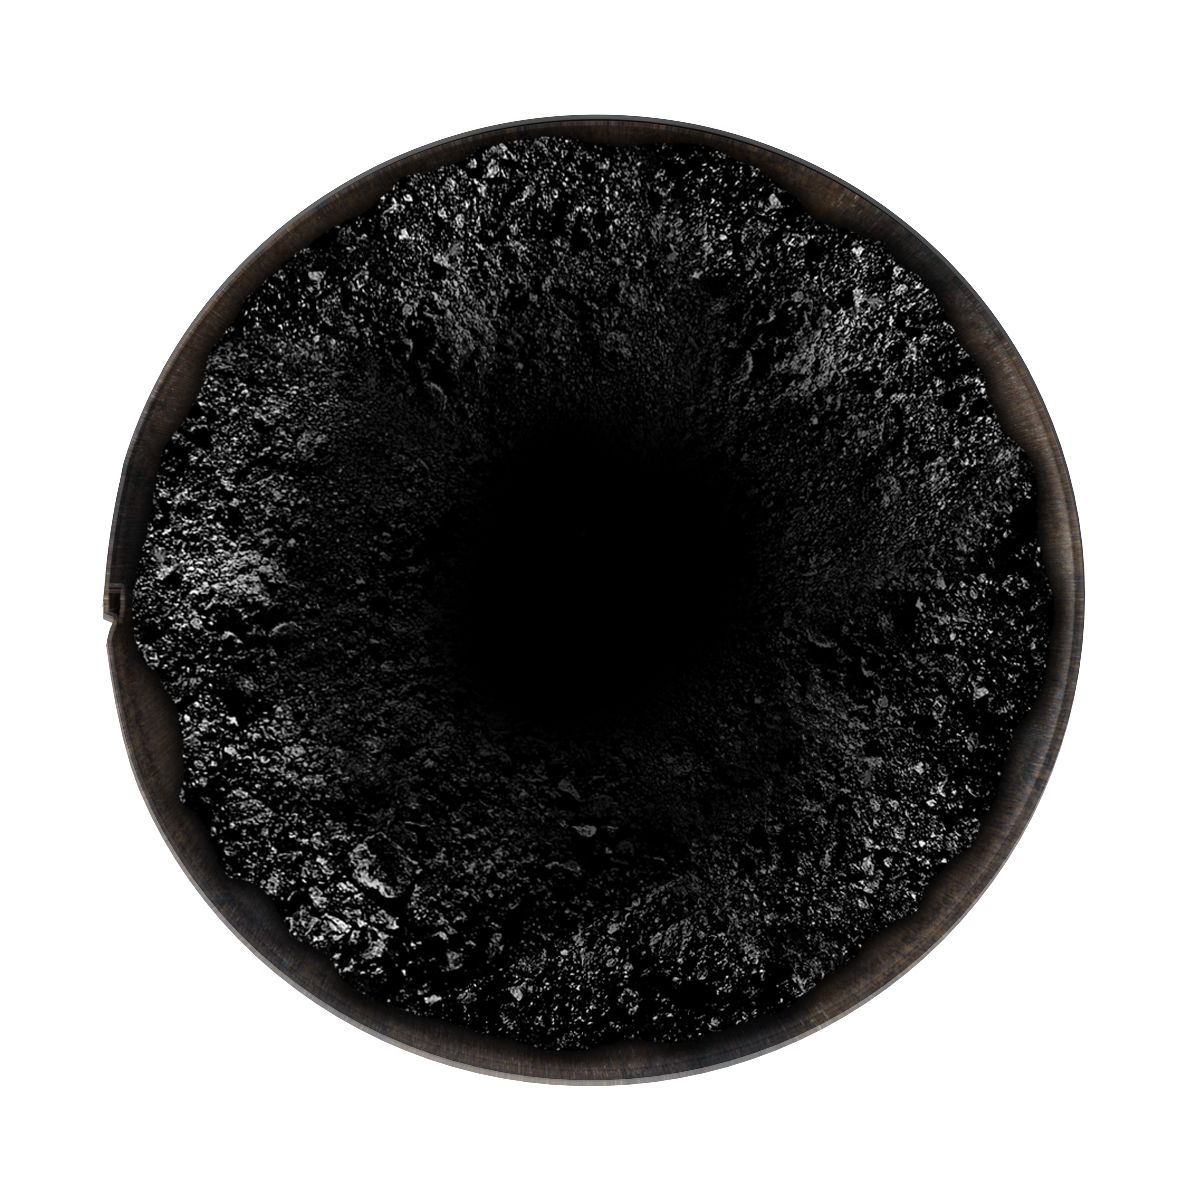
Soot and Creosote are byproducts of the combustion of wood or coal in wood stoves or fireplaces.
Physically, soot (image on top) is powdery to touch, brown or black, and only settle on the surface. Soot is formed from the smoke. As the smoke rises from the stove, the dry particles cling to the pipe lining. Due to its color and consistency, soot can soil your carpets or stain surfaces such as walls and floors. Cleanup can be extremely messy. Protect the area surrounding your wood stove from soot with heat-resistant stove boards.
Creosote (image at the bottom) is a more severe combustion byproduct; it’s tarry, thick, and sometimes flaky. The smoke from flames travels upward and mixes with cold air and moisture from the top of the chimney. Once cooled down, it sticks to surfaces more like cement, making it harder to remove. Over time, the risk of chimney fire increases as the buildup gets thicker.
Toss in a stick or sprinkle some soot remover ideally, once per week, onto a brisk hot, burning fire to prevent further buildup.
Use Soot Remover Dry Sponge to quickly clean soot on exposed surfaces of wood stoves and fireplace walls. Diligently cleaning these surfaces will prevent the accumulation of baked-on dirt and soot.
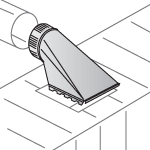
How to install wood stove pipes, elbows, and accessories
Creosote vapors condense in the relatively cool chimney flue of a slow-burning fire. As a result, creosote residue accumulates on the flue lining.
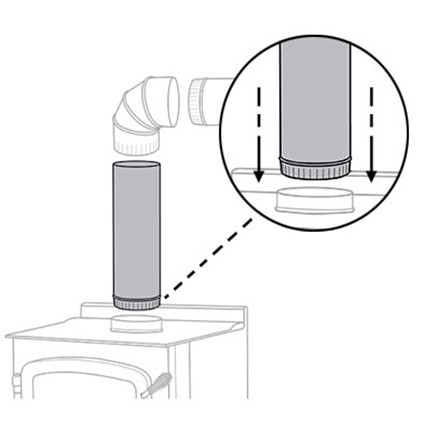
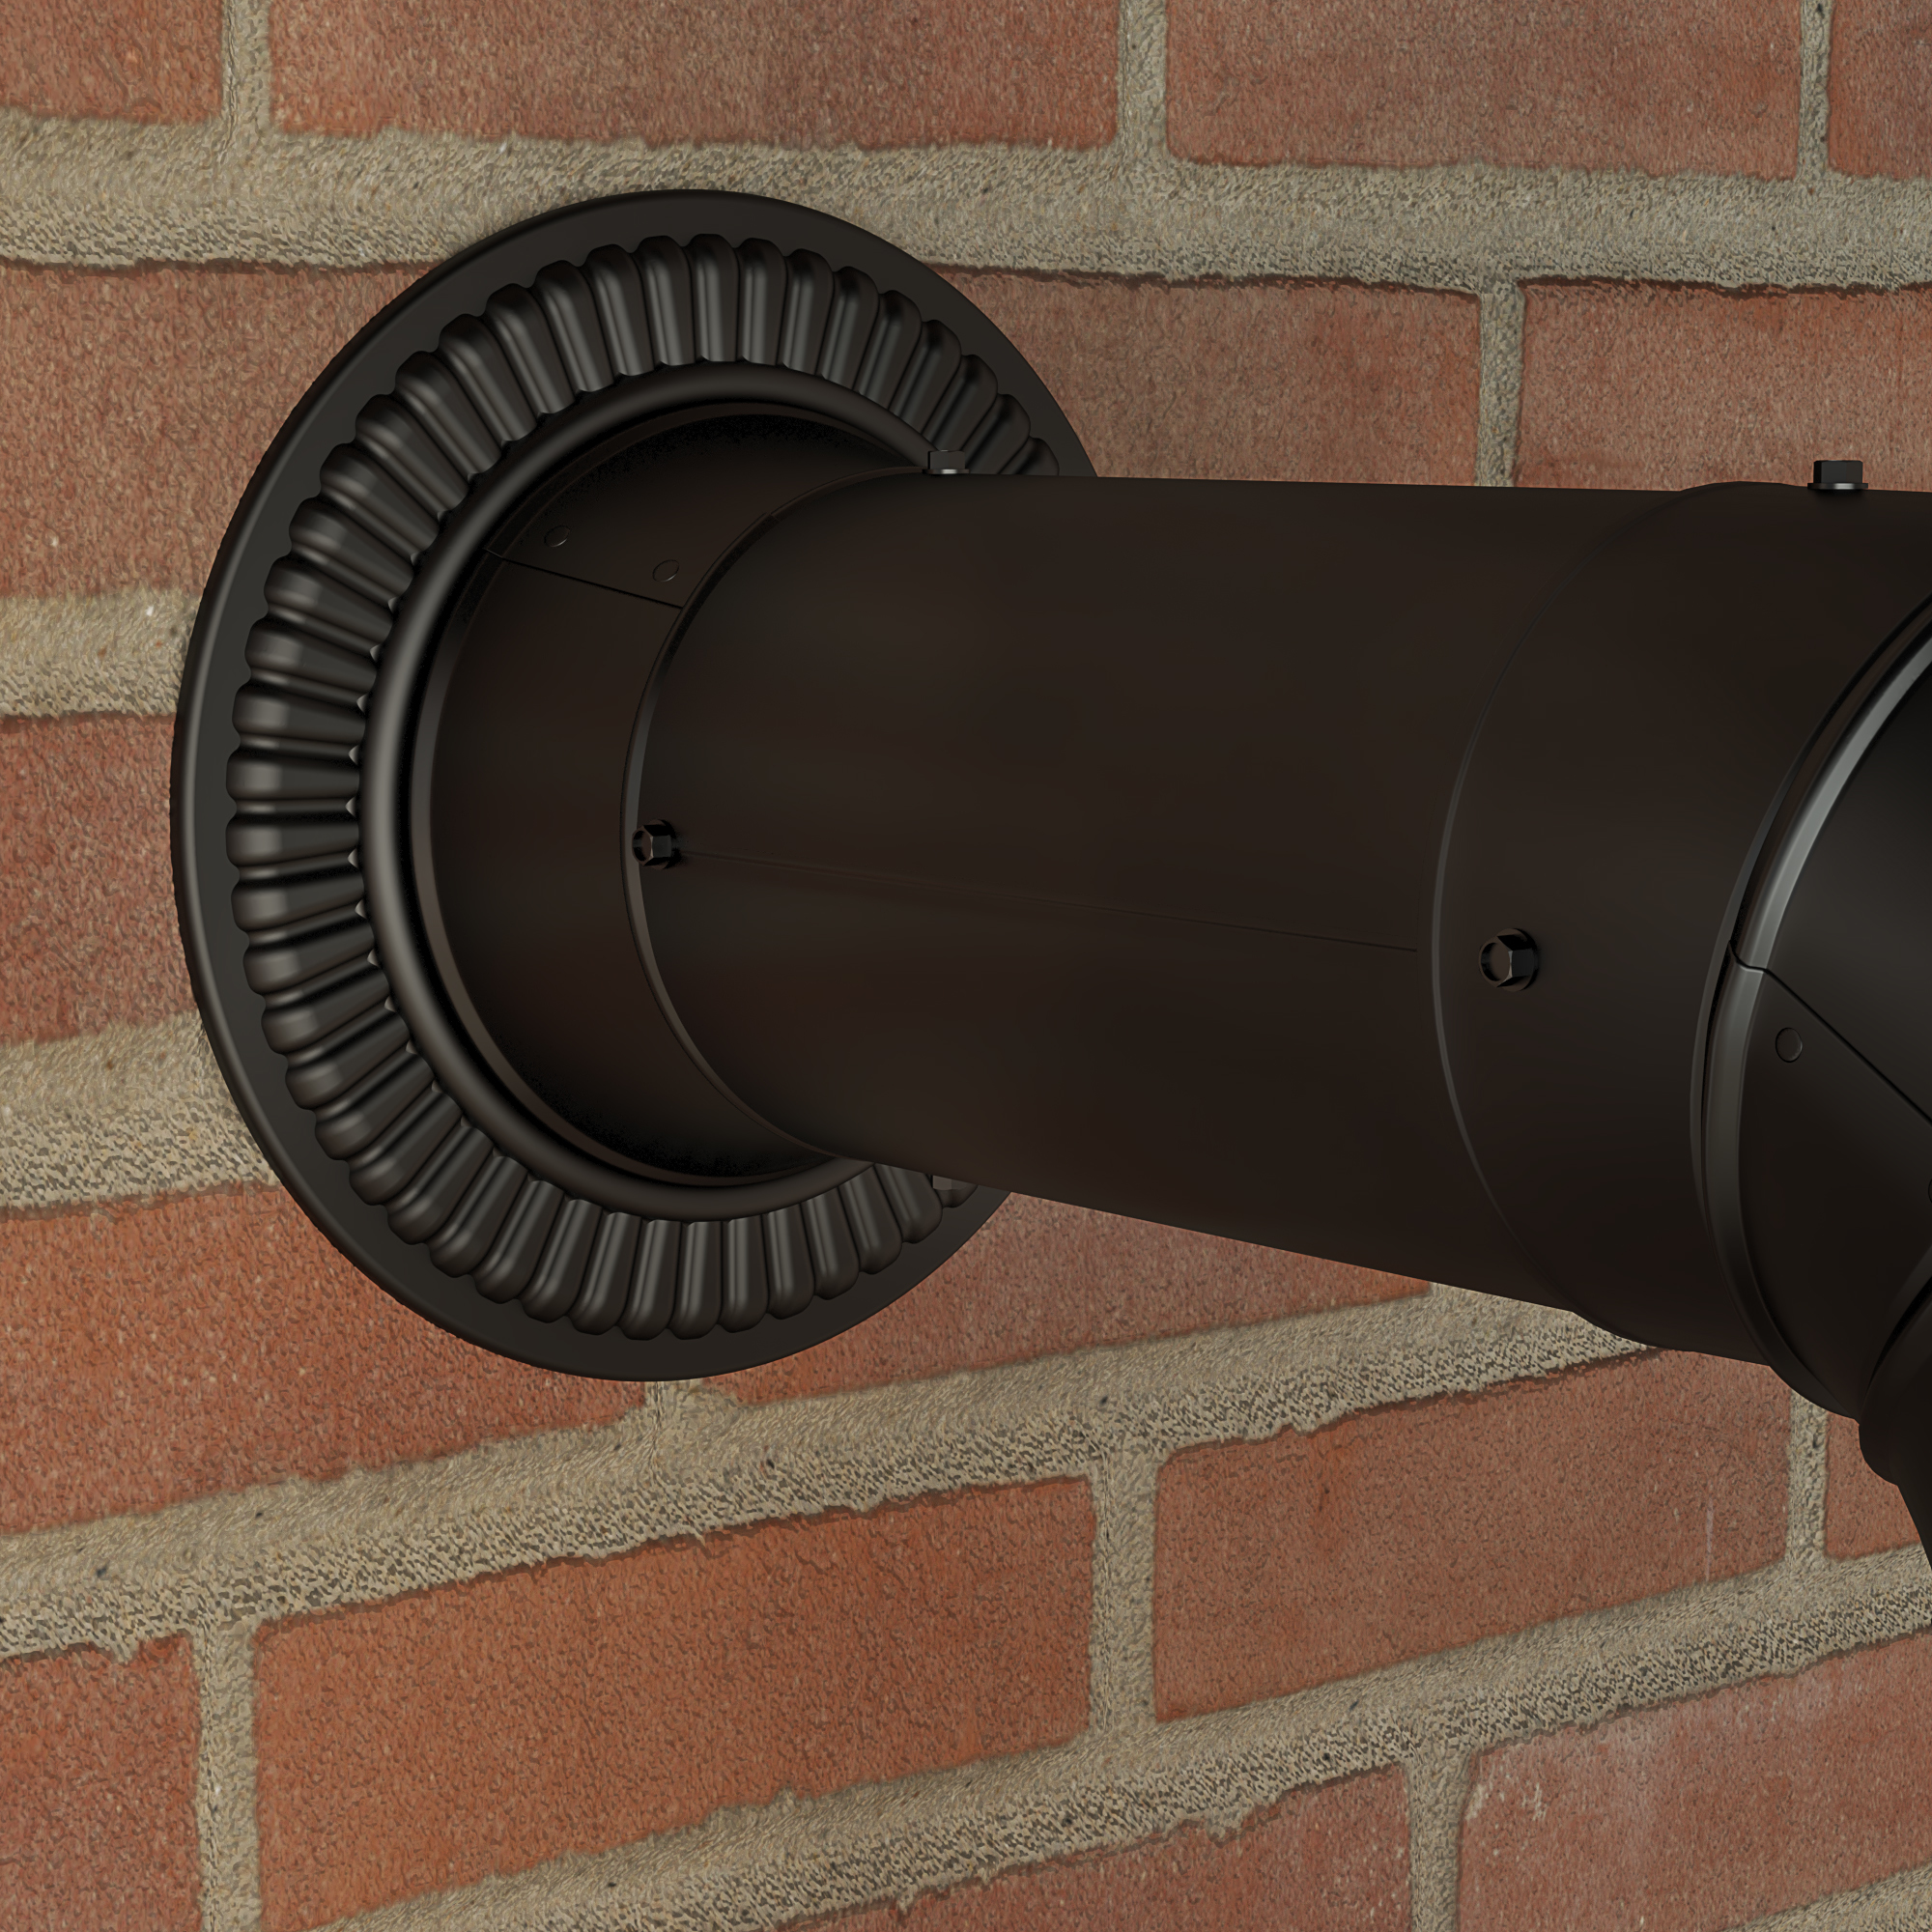
Install stoves pipes, elbows, and other fittings with the crimped end toward the appliance.
Always insert the stove pipes to the stove collar with the crimped end or male end pointing down. It is necessary to have the stove component’s male end point toward the stove to ensure condensation and creosote travel down only within the pipe to prevent creosote leakage. Connecting pipes this way will result in adequate condensation. It will allow the creosote to flow within the pipe and return to the firebox to be burnt and fully dissipate. See picture.
Exposed creosote is not only unappealing; it is also a fire hazard and a health risk. Avoid creosote leakage by properly installing a stove pipe.
Creosotes and how to treat it

What are creosotes?
Creosote is a byproduct of burning plant-derived materials or fuels. When combustion happens in woodstoves, the rise of high-temperature smoke from the flames mixes with cold air and moisture from the top of the chimney. The condensation forms traces of coal tar in the pipes that solidify and get thicker over time.
The buildup of creosote is a fire hazard and health risk. Annually inspecting woodstove pipes is recommended to prevent chimney fires and downdrafts, avoiding toxic substances from entering your home.
Once inspected, what do I do next?
Treating creosote buildups depends on its severity. There are three (3) stages of creosote problems. Determine the extent of your creosote problem first to know how to treat it efficiently.
First Stage
At this stage, the creosote looks dusty, flaky and can be removed by a chimney brush. Catching the combustion particles at this stage and treating it is the best time before it gets worse.
Choose among Imperial Chimney and Pellet Stove Brushes to clean out the creosote from in flue pipes.
Toss in a stick or sprinkle some creosote conditioner ideally, once per week, on a low burning fire or bed of coal to prevent buildup and turn flaky creosote to brushable ash consistency.
Second Stage
You will notice minor or formation creosote buildup. The creosote is thicker, starting to form layers, and it looks more like tar than soot. Sometimes, it may look flaky to an untrained eye, but the creosote has firmly adhered to the pipe lining. A more industrial and rigid approach to cleaning is needed. Rotary loops and drills are required to remove the creosote at this stage. Often, chemical solvents help loosen the buildup for easier removal.
Sprinkle some creosote treatment powder onto a low fire or bed of coal twice-weekly for four (4) weeks to break apart the creosote buildup. Then use a chimney brush or rotary loop and drill to clean out the loosened creosote.
Stage 3
There is a large amount of coal tar encrusted on the pipe lining. The rotary loop cannot penetrate or spin thru the gunk, and treatments are deemed ineffective. At this stage, the buildup is dangerously flammable. The creosote is so thick that it acts like fuel, catching fire quickly.
The creosote can still be removed at this stage, but more often than not, the replacement of flue pipes is more cost-effective.
How to adapt a large chimney opening to a smaller woodstove and vice-versa?
In general, the entire wood stove installation should run on a one-size stove pipes system. Not running the same size stove pipes or running the pipe line from a large stove opening to end on a small chimney pipe will cause draft issues and excessive creosote within the pipes that will reduce the efficiency of your stove.
While a transition in diameter of stove pipes is not recommended, if one is necessary, make it at the farthest point possible from the stove appliance, i.e., at the chimney outlet. Installing the increaser or reducers away from the stove will maximize the evacuation of flue gases allowing warm air to rise steadily within the pipes.
Note: Unless your appliance manual recommends it, do not use a reducer. Reducers can cause downdrafts.

Why is initial burn crucial before using a wood stove?
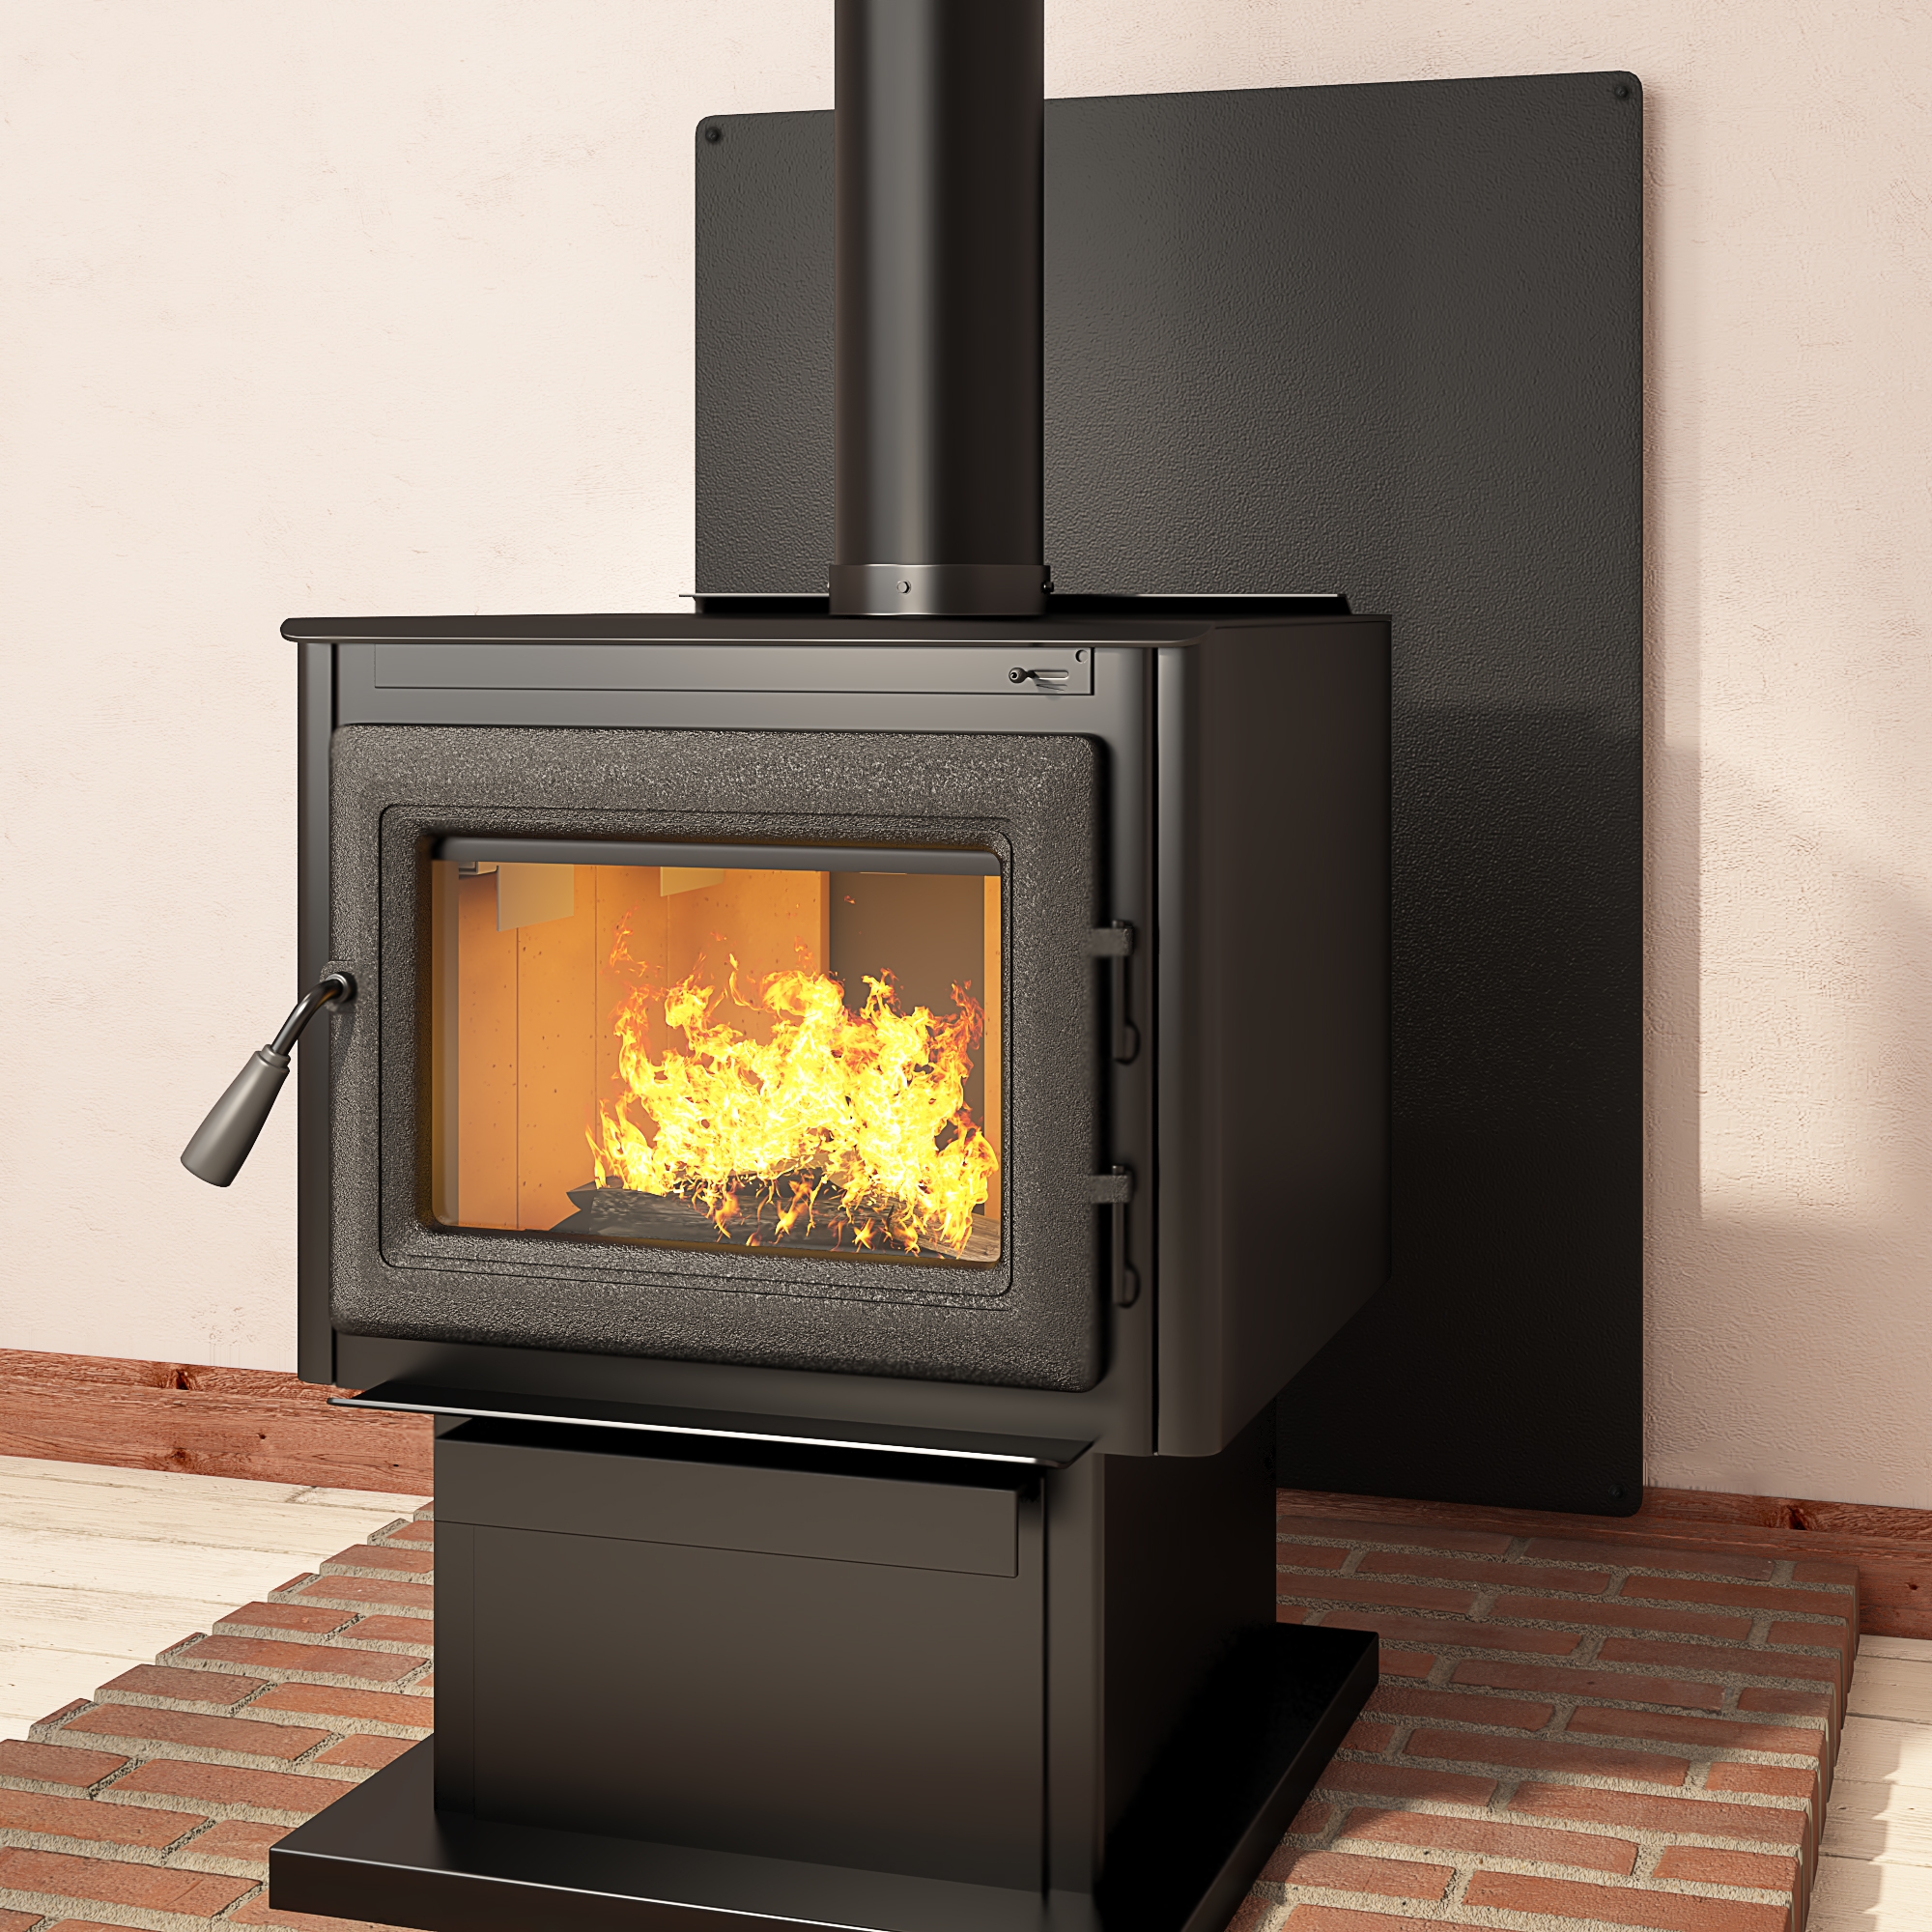
Initial Burn
The paint on newly bought and installed black matt stove pipes or accessories is not cured. The protective high-temperature paint will melt and peel off if the paint is not cured correctly, per instructions.
Curing occurs during the first burn. Allow the stove pipes and accessories to cure under 475° F heat for 2-3 hours. This procedure will cause a non-toxic odor for the first hours of burning.
Note: We recommend leaving a window open close to the stove area during the paint curing process to allow the burnt smell to escape.
If your wood stove is an airtight model, you may have to leave the stove door open 2 inches to allow the stove to reach a high burn temperature, as airtight stoves burn at lower pipe temperatures than non-airtight stoves.
Note: Do not leave the wood stove unattended while burning with the stove door open.
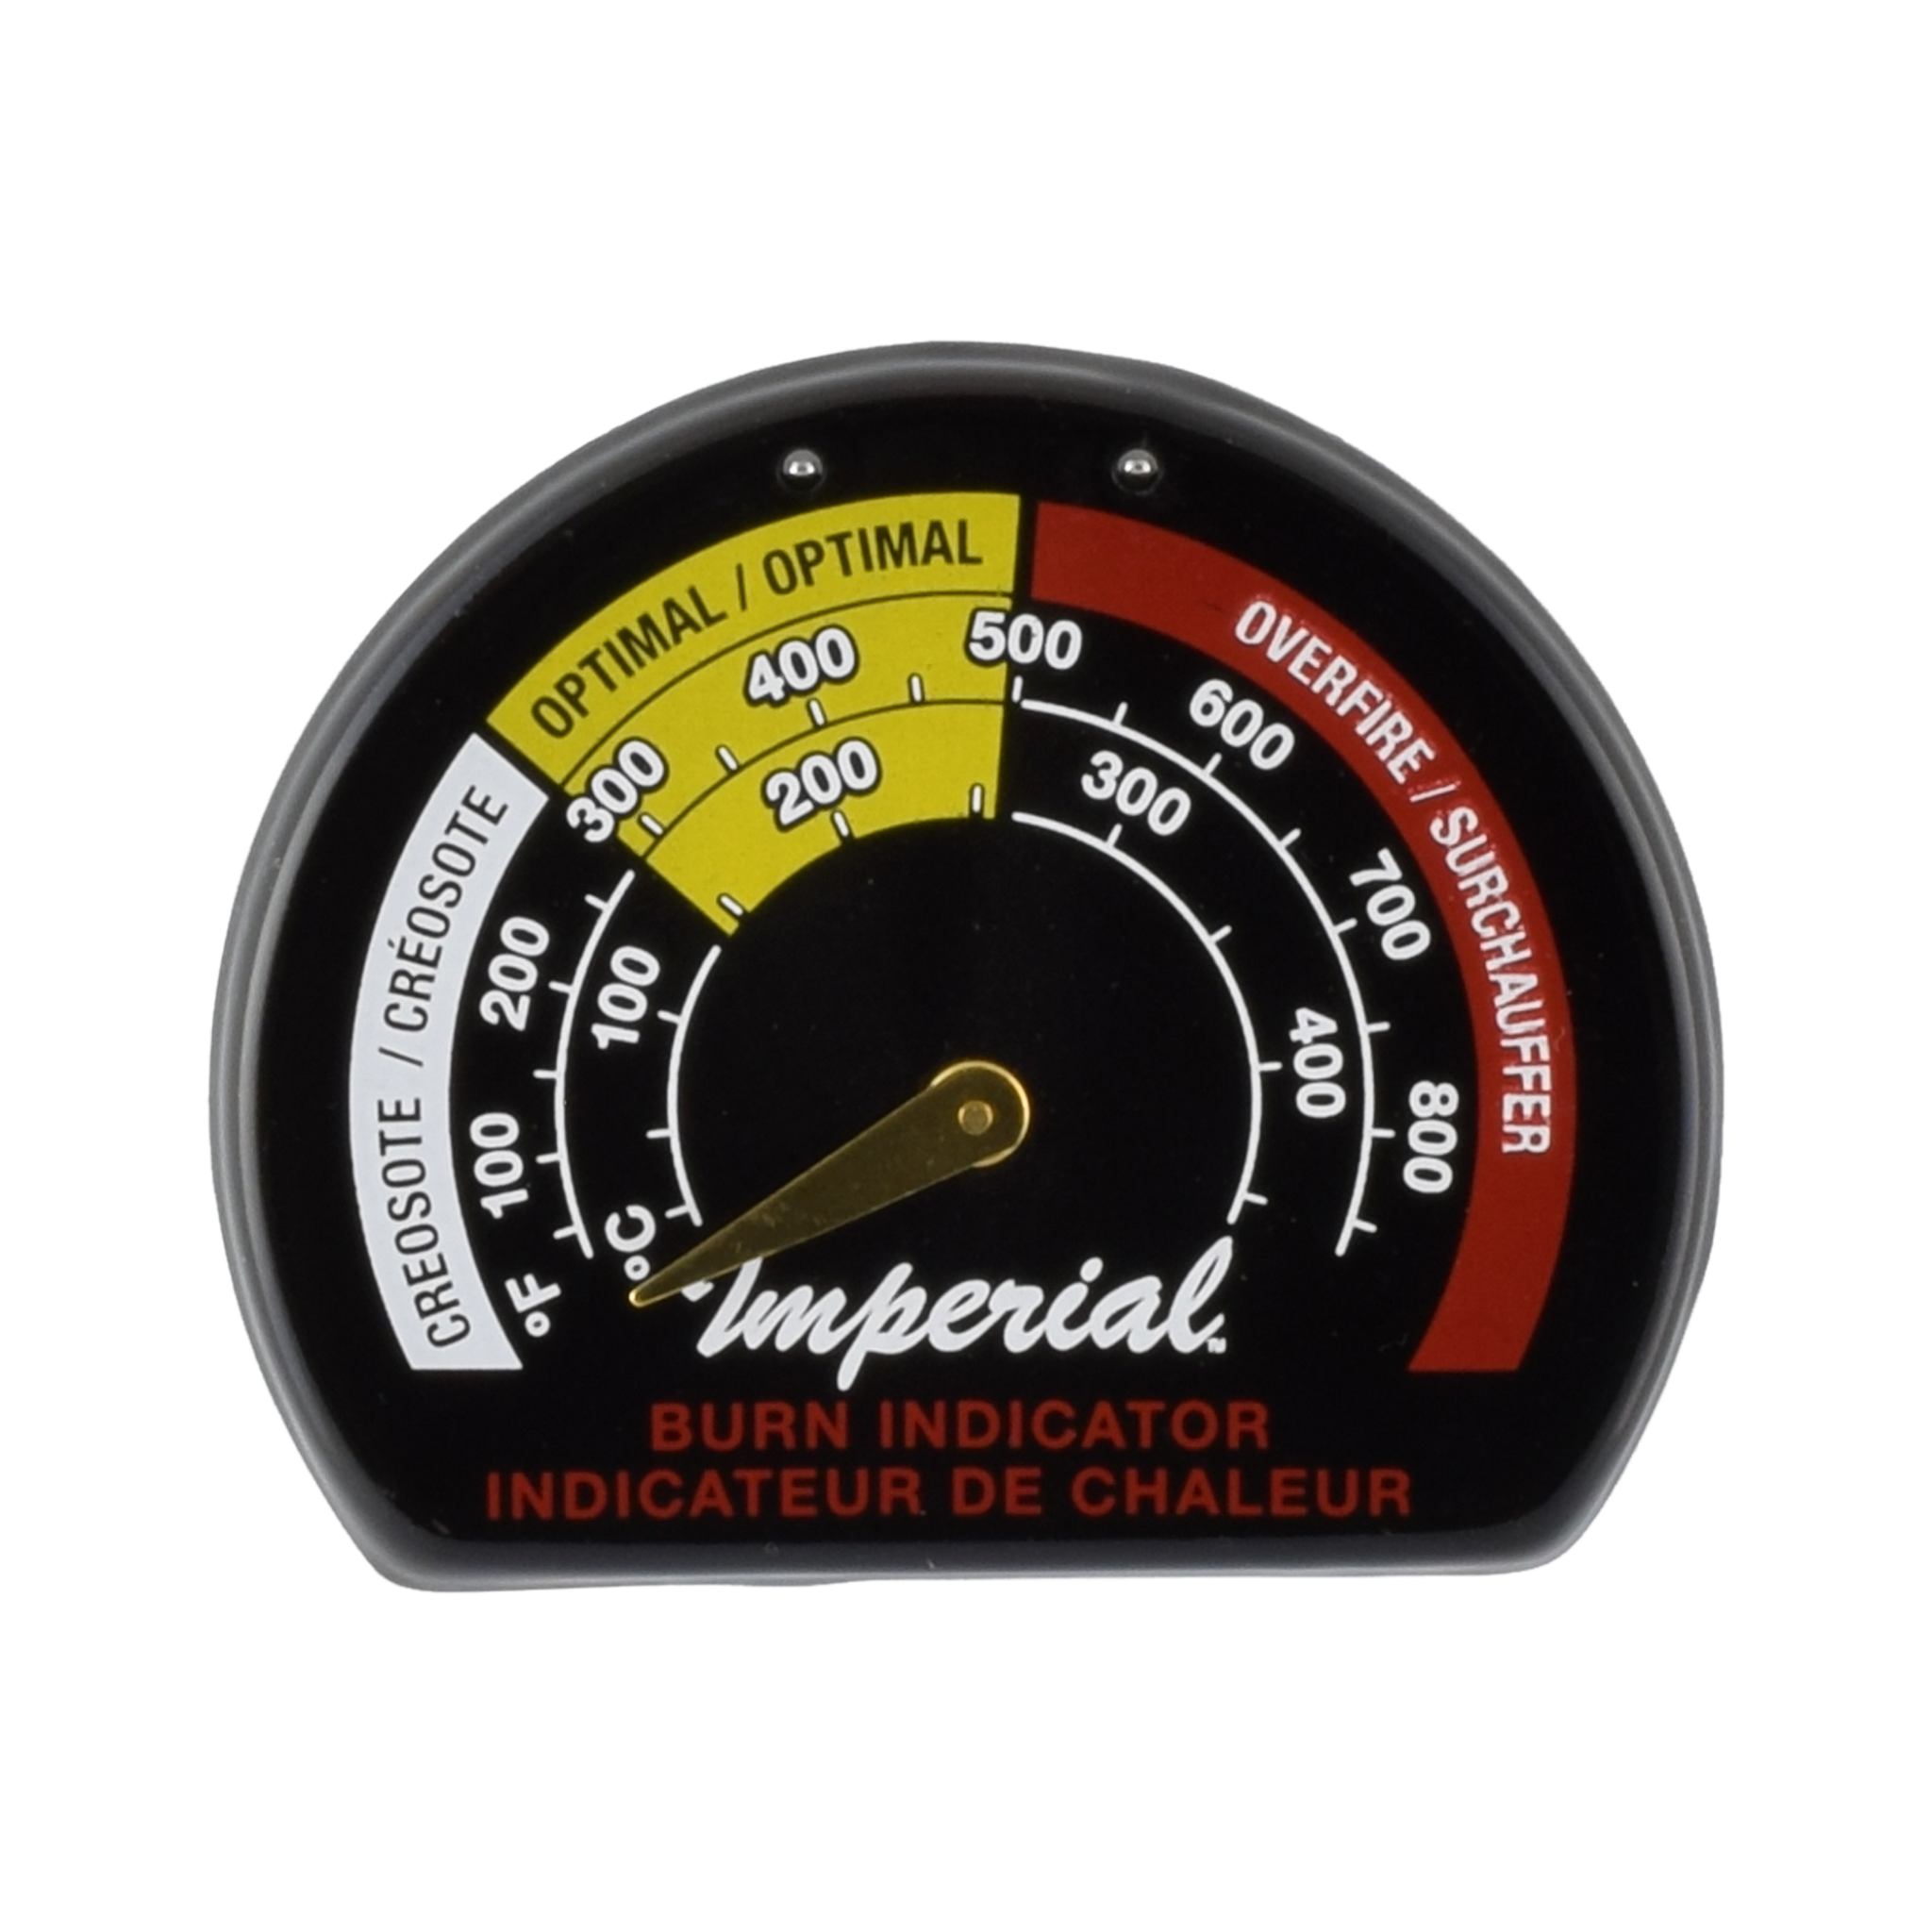
Imperial Burn Indicator (Magnetic)
Use a burn indicator to determine the burn temperature.
Place it on the single-wall stove pipes 18” above the stove.
Prevent smoke leakage from woodstoves
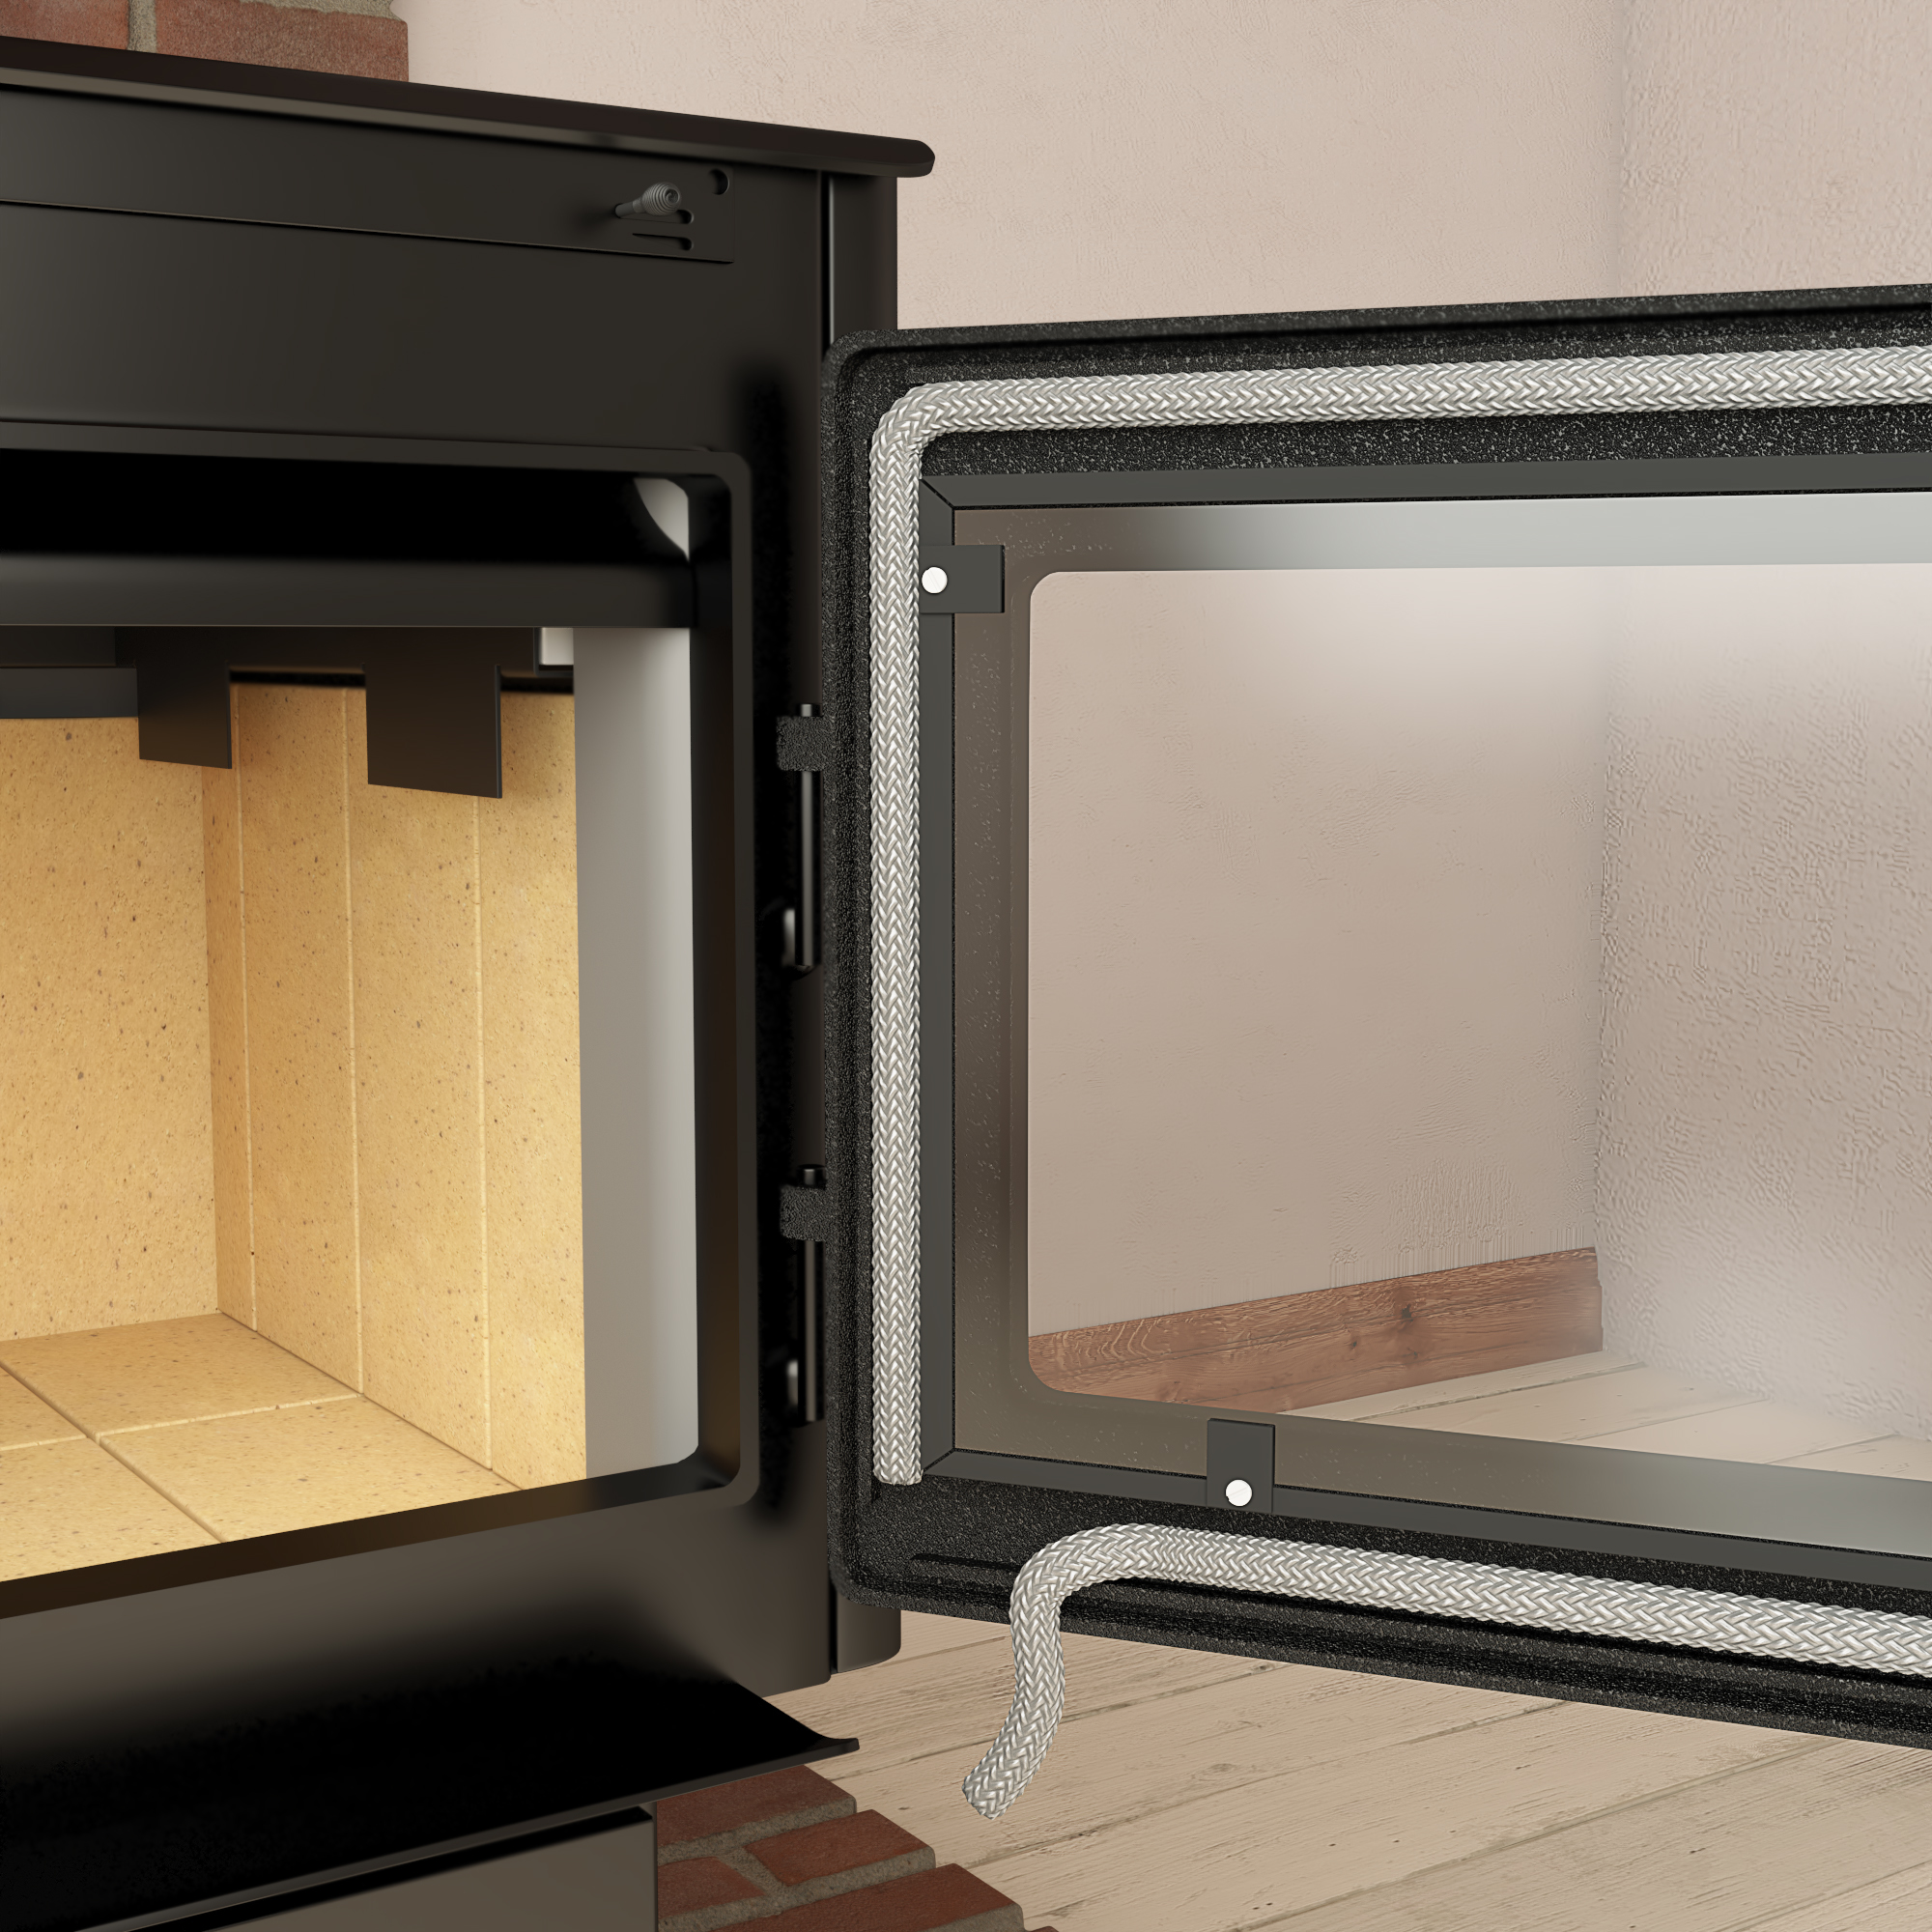
Replacement Gaskets
All woodstoves must have an airtight-sealed door to prevent air leakage, foggy glass stove door, and overheating.
We recommend that you replace the door gasket every year to keep your wood stove in good working condition. Before using your stove for the season, remove all the old gasket and run a new one around the stove door channel. Make sure that you use a gasket adhesive and press the gasket firmly into the channel. The gasket adhesive will secure the gasket in place for a long time.
What are Type 1 and Type 2 Stove Boards?

TYPE 1 STOVE BOARDS have an R-value of 0. For use with appliances that require only ember protection. Do not use this stove board for appliances that specify Type 2 thermal floor protection or a specific R-value requirement.
TYPE 2 STOVE BOARDS are for use with appliances that require thermal floor protection or ember protection, or both. This stove board has an R-value of 1.5.
*The R-value must be equal to or greater than the R-value of the heat-producing appliance.
Protect yourself

- We recommend that you always wear protective gloves and follow product instructions closely.
- Make sure to use cleaning and maintenance products on cooled-down surfaces or only at required conditions to avoid bodily harm.
- Always read the labels and SDS sheets of our Stove and Fireplace Maintenance Products before using them. Some of our products include Crystalline Silica, a mineral known to the State of California that can cause lung disease and cause cancer. Proposition 65 Warnings Website - Your right to know (ca.gov)
Methods and the tools to clean a chimney

METHODS

TOOLS
There are three (3) methods to clean chimneys.
The necessary tools depend on the method of cleaning and chimney type.

Wood Stove Pipe Components Installation Tips
Tips to consider when installing wood stoves
Stove Pipe Components
- 18-in minimum clearance from combustible materials is required
- 24-gauge, cold-rolled steel construction for durability and lasting performance
- Black matte paint coating that resists heat, surface scratching, and chipping
- Paint coating that tolerates maximum continuous operating temperatures of 700° F, with short exposures up to 800° F
- Crimped male ends on most stove pipe components for snug pipe connections
- Install crimped end down toward the stove to prevent condensation or creosote leakage
- Secure stove pipe connections with at least three (3) self-drilling stove pipe screws
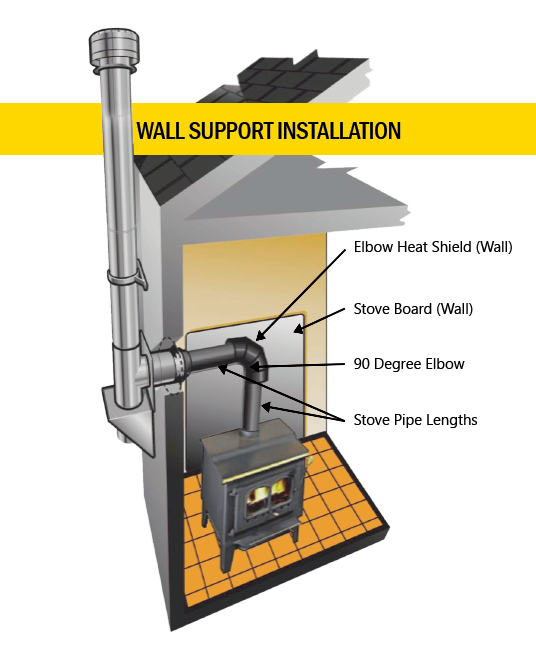
Heat Shield and Stove Boards
- Heat Shields can reduce the clearance between stove pipe and combustible materials by 67%
- Stove Boards or thermal hearth pads (Type 1 or 2) insulate and shields floors, walls, and ceiling from heat, hot coals, ashes, and soot
- Stove Boards (Type 2), when used as a wall protector, require 1-inch clearance from walls; use wall spacers
- Combination of stove boards, stove pipe, or elbow heat shields in any wood stove installation is a standard practice
Scroll down for other types of installation.

For more details about these products and others, explore our stove pipes & accessories pages.

